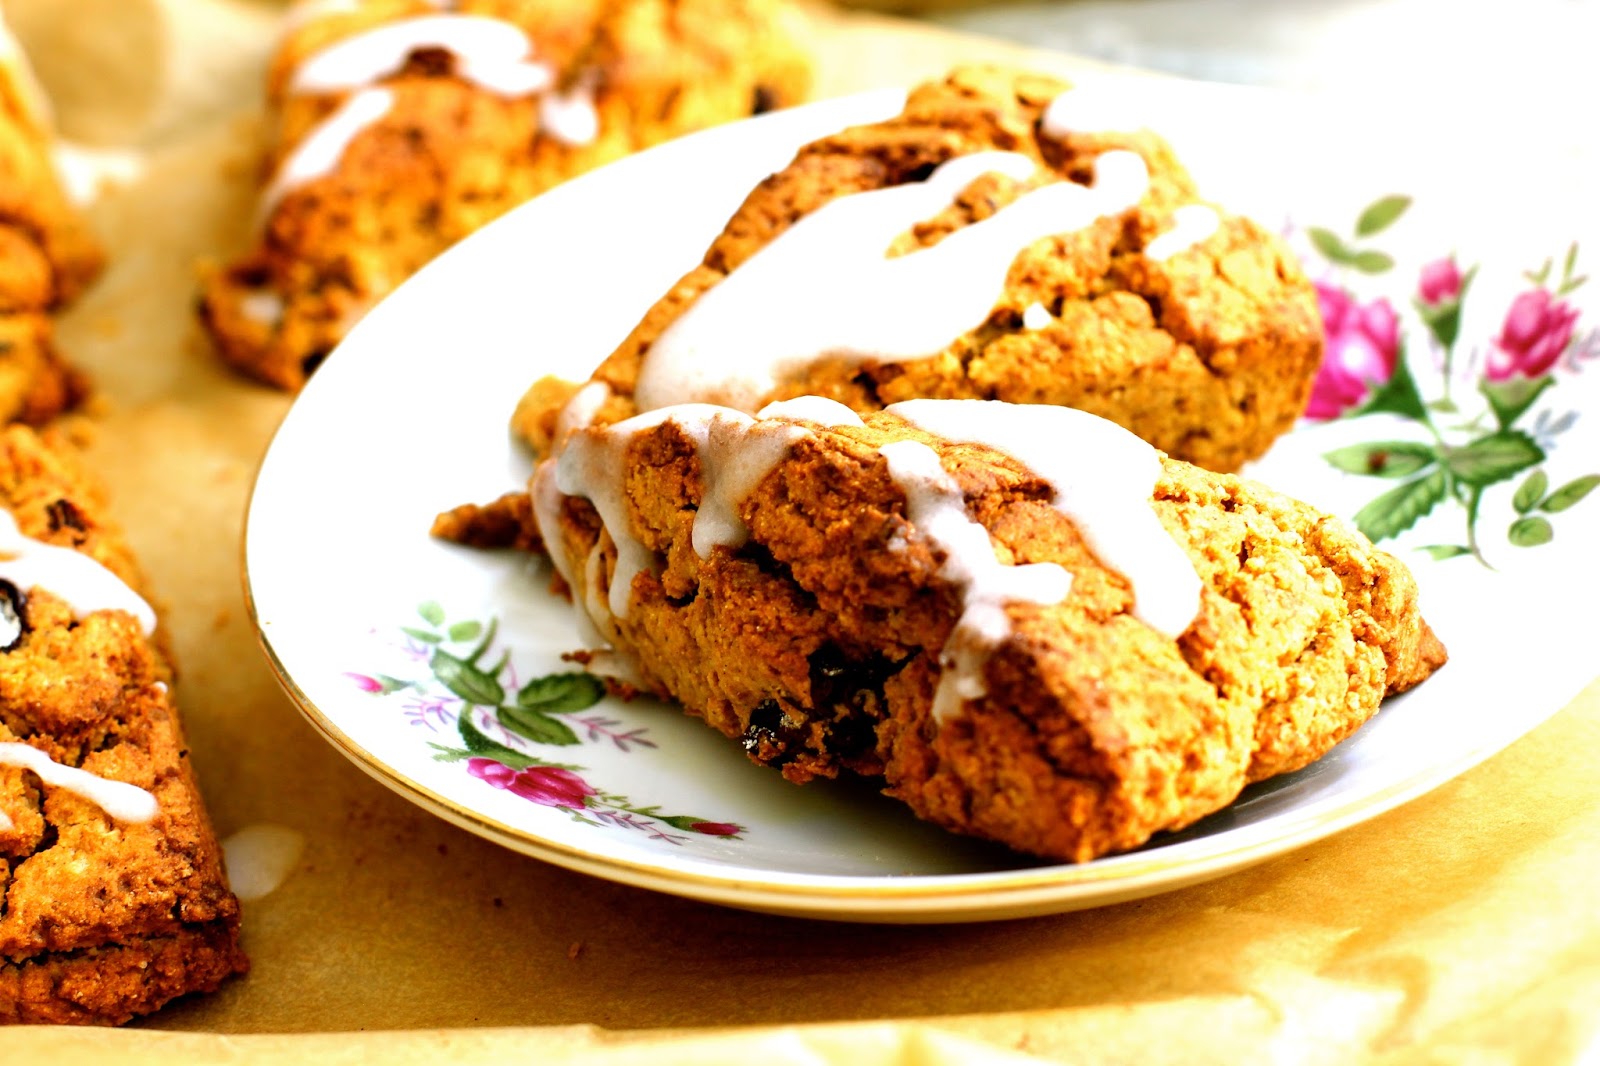
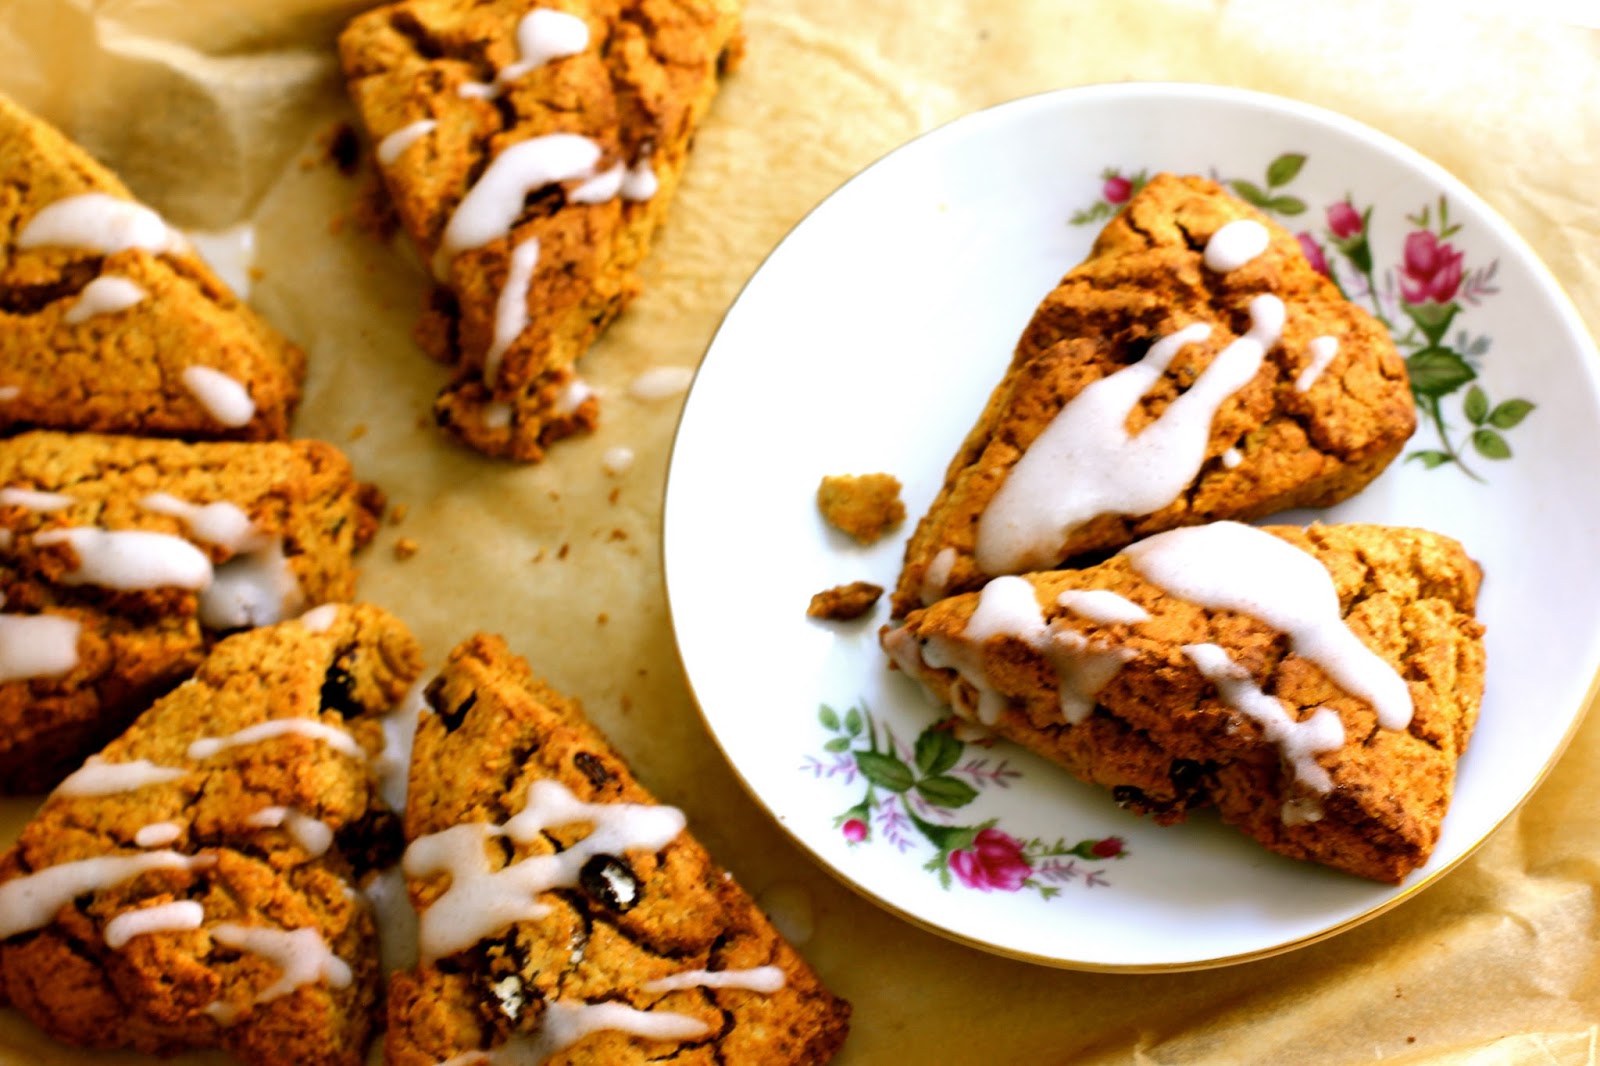
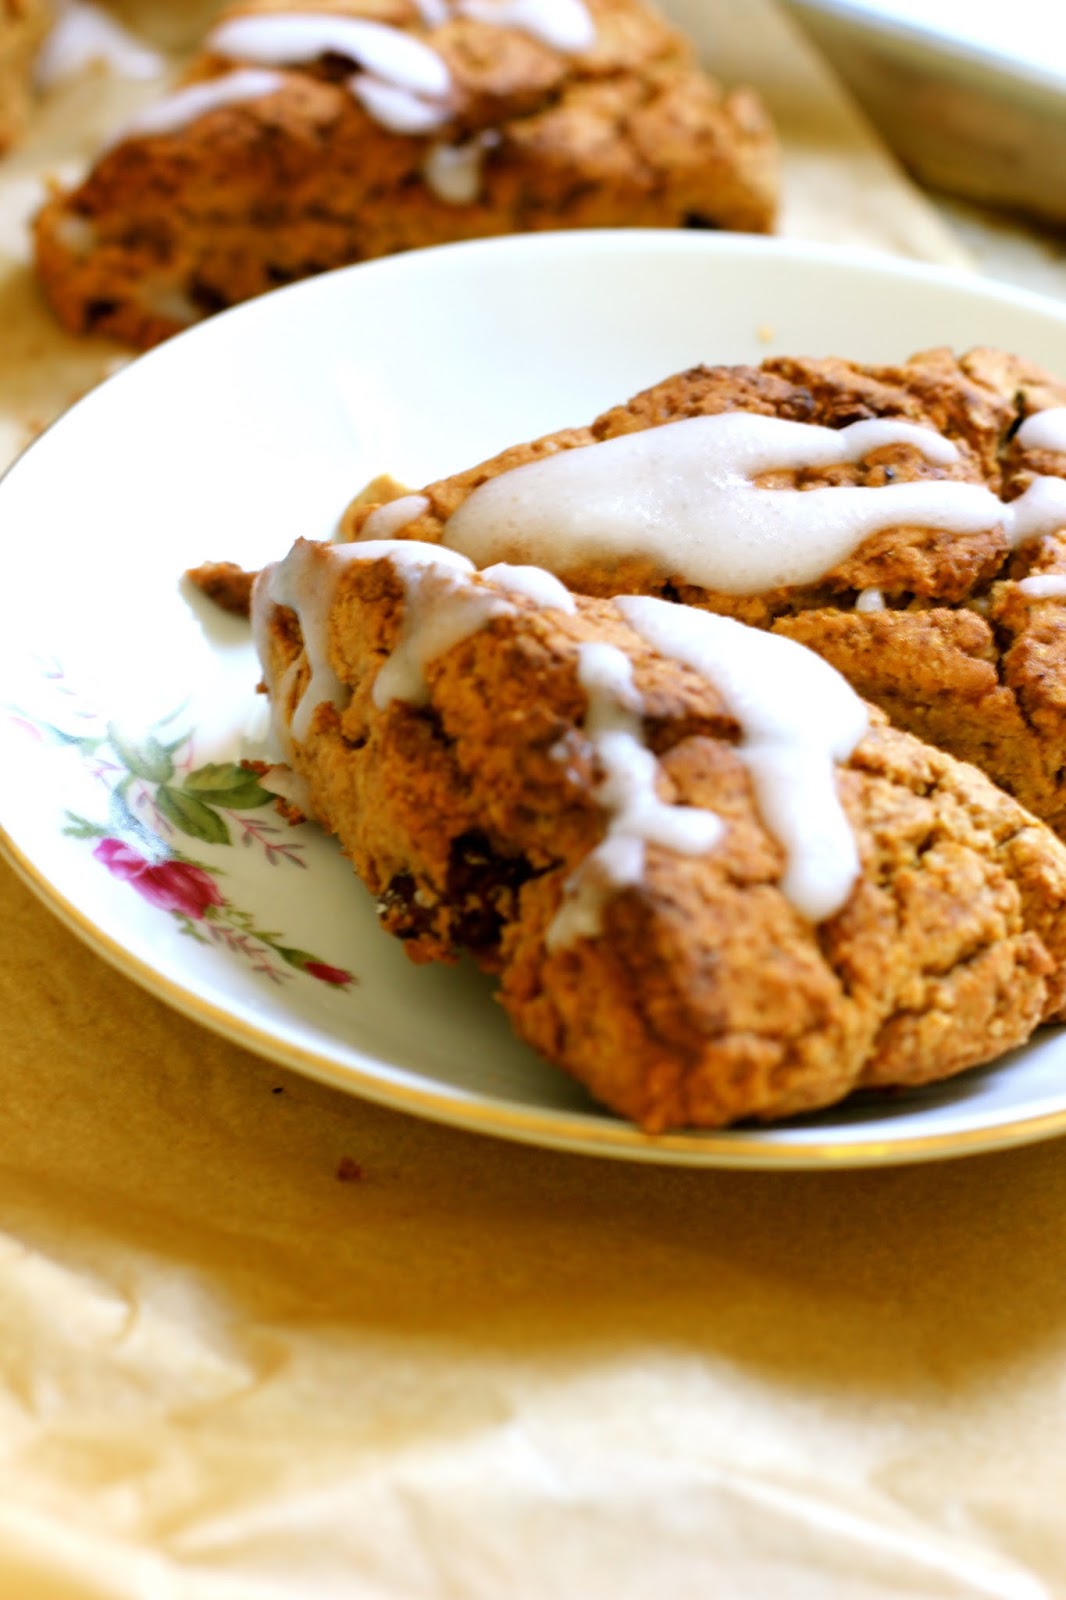
A Vegan Obsession

  • Home
  • Recipes
  • Travel
  • Product Reviews
  • Giveaways
  • News & Interviews
  • About
  • Contact

Glazed Cherry Scones [allergy friendly recipe]

July 22, 2013 by India Leigh

Glazed Cherry Scones [allergy friendly recipe]


Annie, loves baking and loves using well known British confections to add interest to her bakes.  It’s all a bit horrifying for a vegan health freak.  It had me running, screaming for cover by my power juicer!  Annie has long lists of sweet and original recipes on her blog, with helpful step by step photography.  Who’s Annie? you may ask.  She is Annie of Annie’s Noms  And she was my cooking pal for this months Secret Recipe Club.  I know, where did the last month go? It flew!

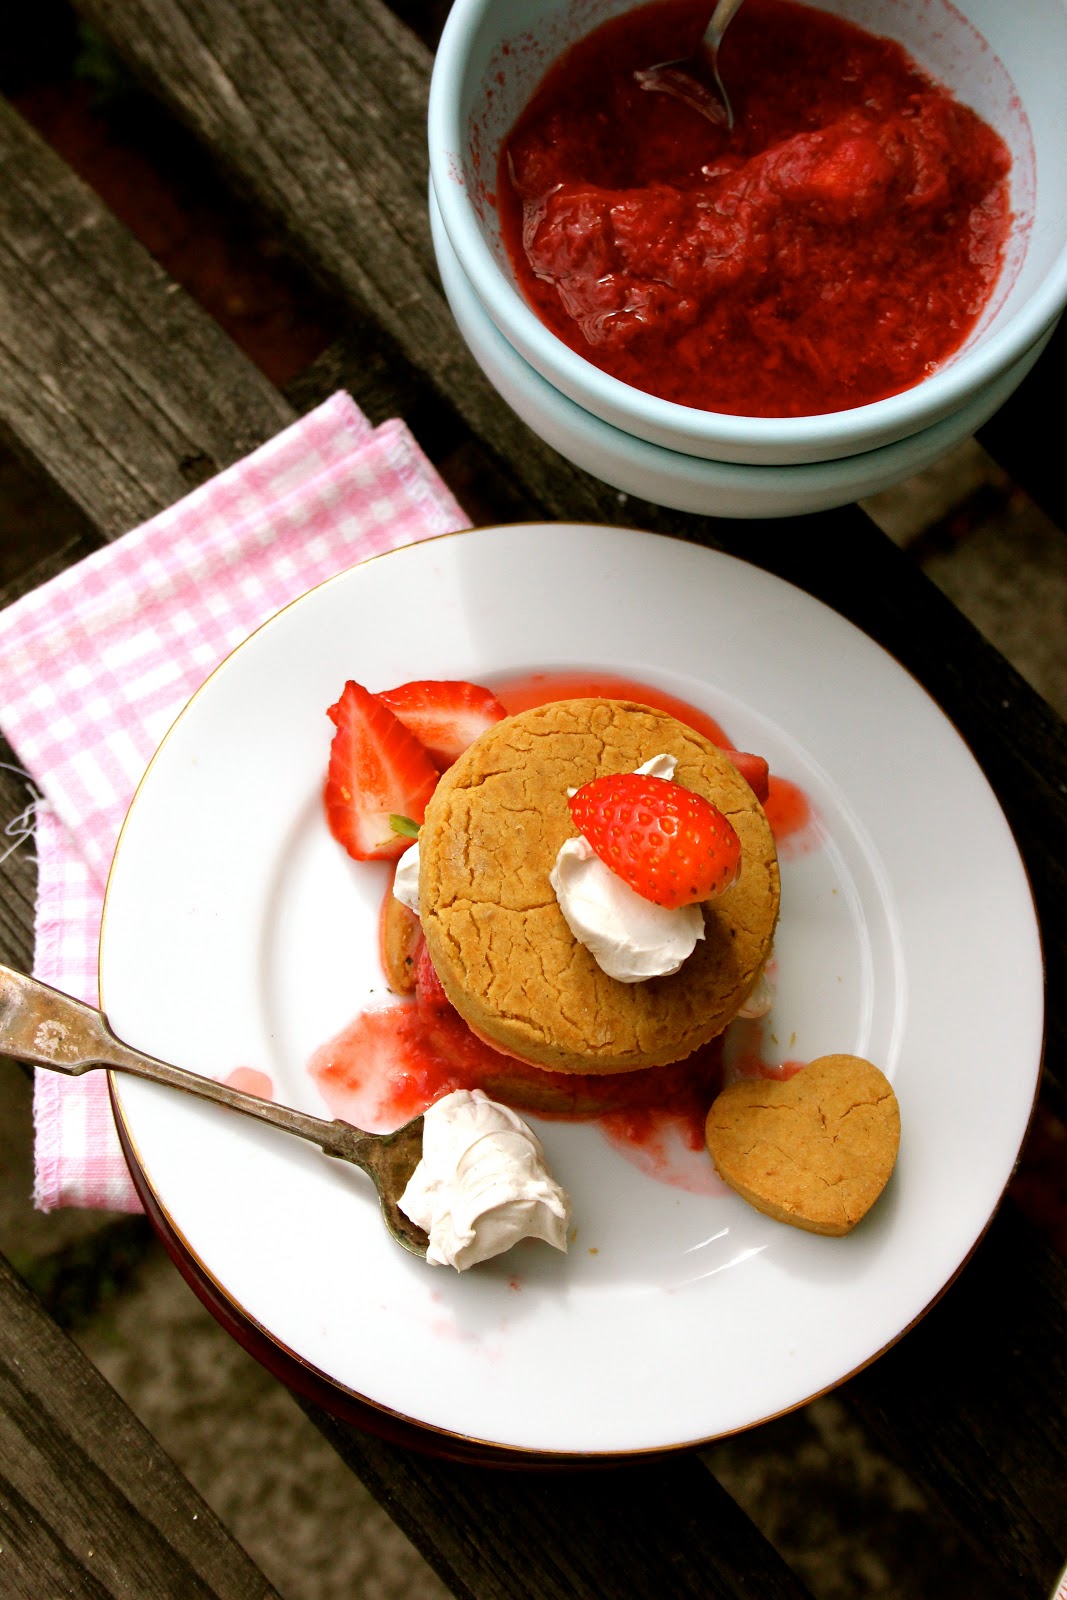
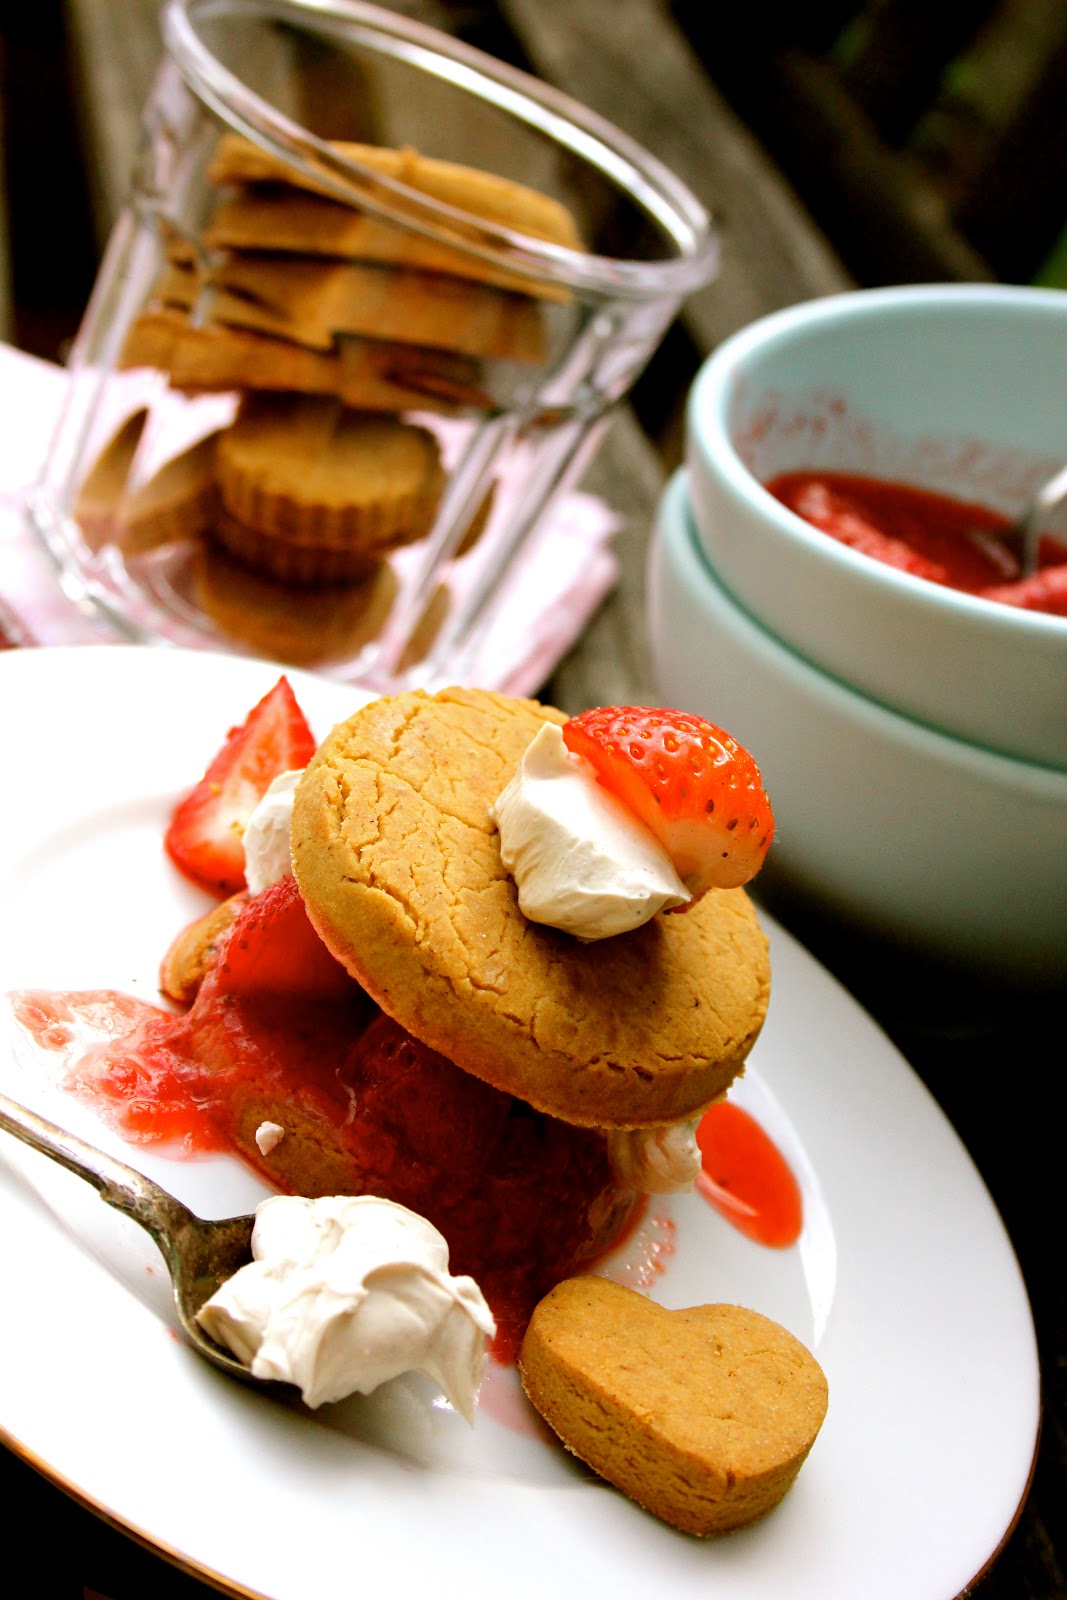
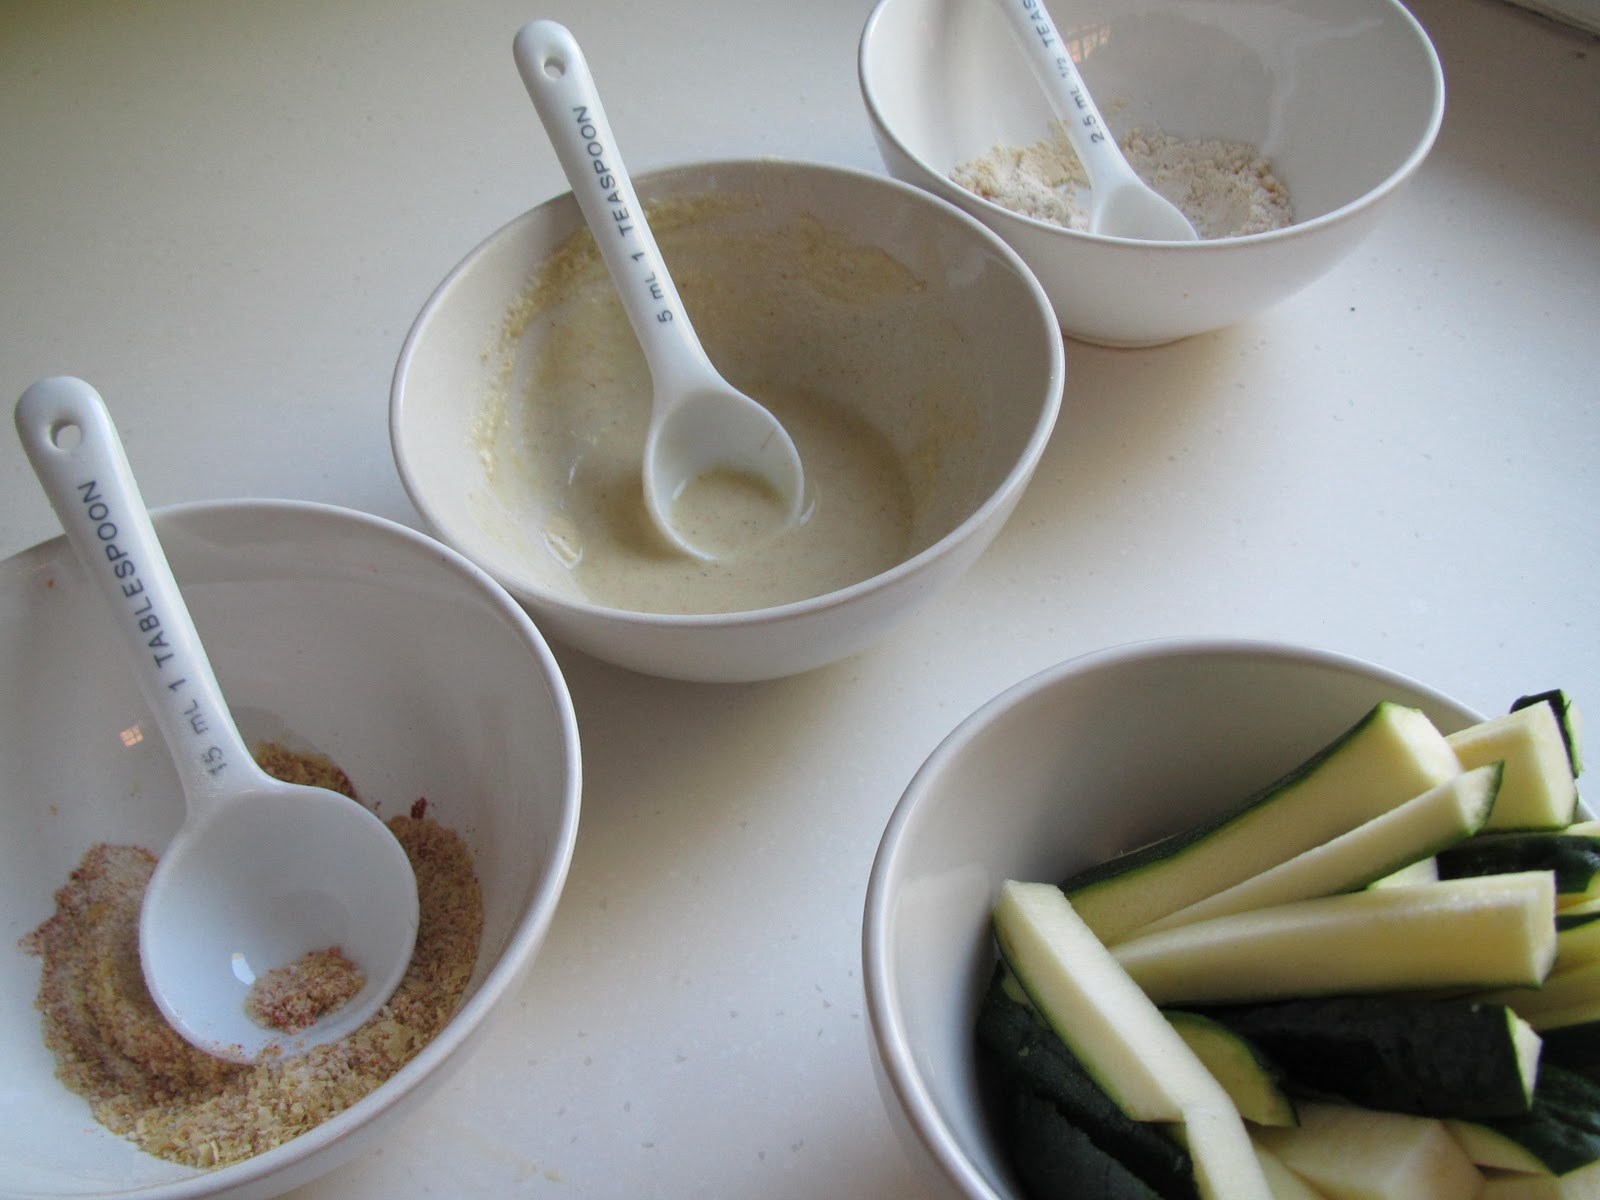
I’m  currently getting ready to move, and I’m gradually munching through my food stores so I don’t have to pack, or worse still waste any.  I didn’t want to go out and buy any more food, so I chose a recipe based on both having the ingredients in my cupboard already and well, greed. I fancied scones.  I’d not had a scone for years. I hate moving. I deserve scones!

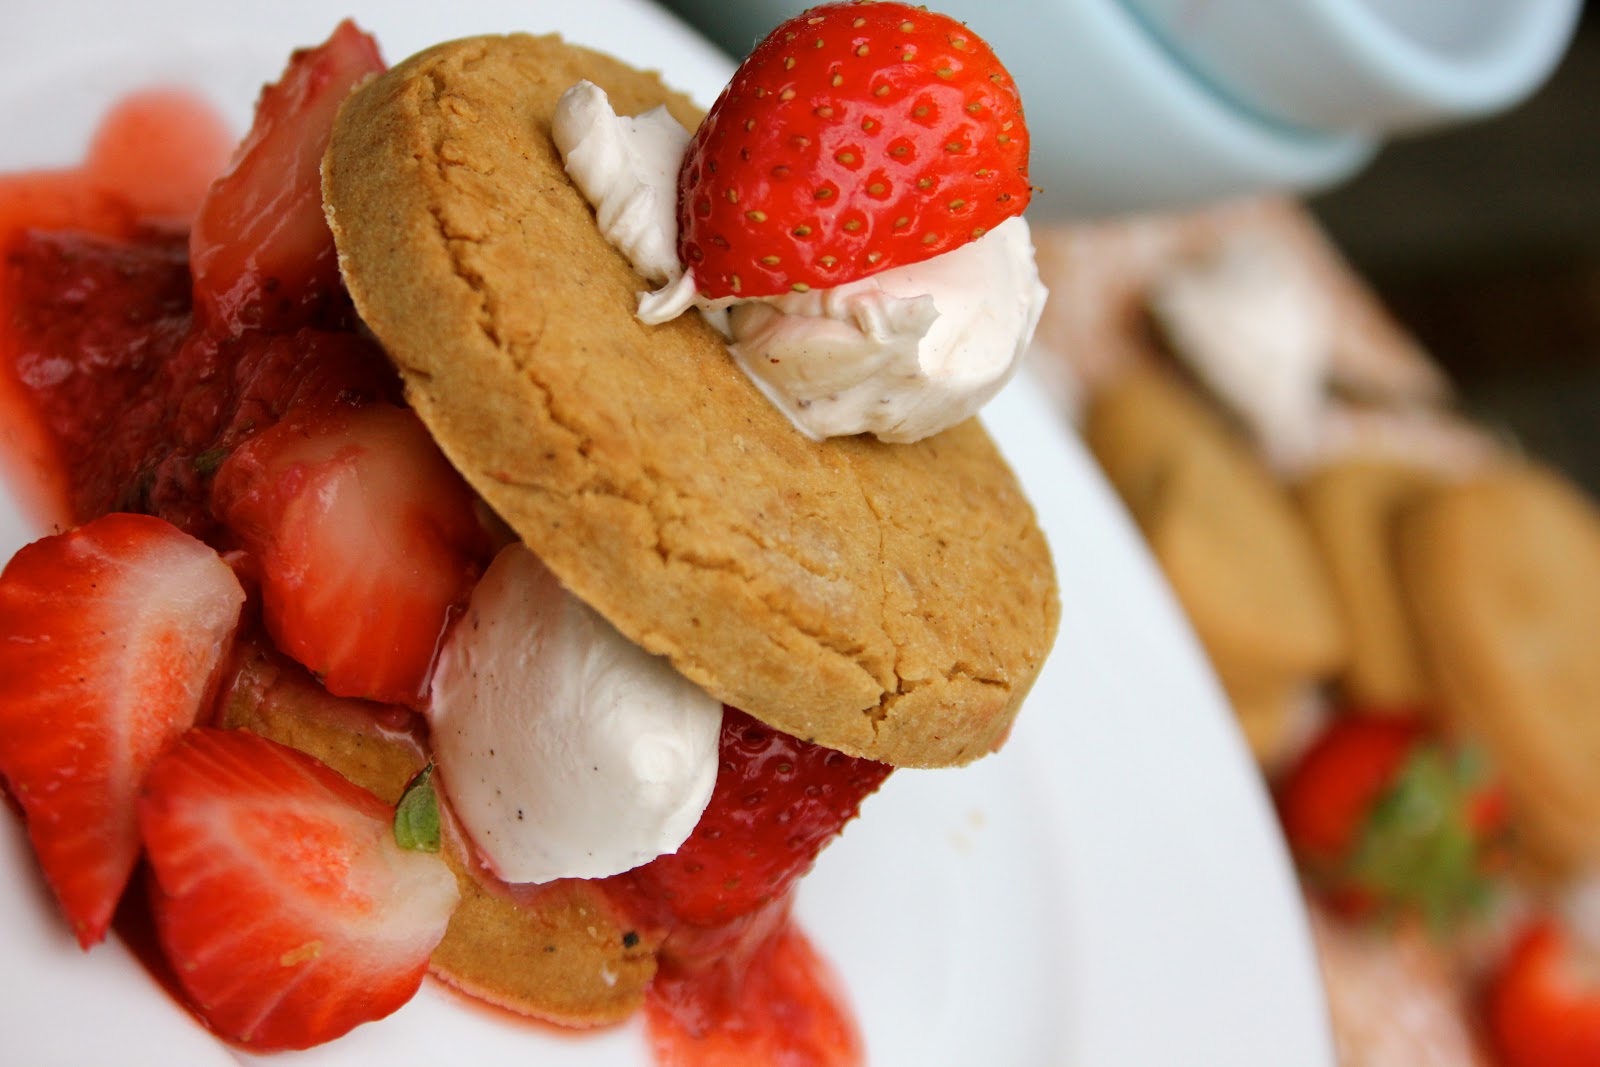
As you probably know by now, I’m gluten and sugar free as well as vegan.  A road my body has forced me down, rather like a culinary sheep dog, herding ‘safe foods’ into a pen. So, therefore, I had to change this recipe up.  I kept the basic concept though.  Cherry scones.

For the original recipe Annie’s Cherry Scones.  

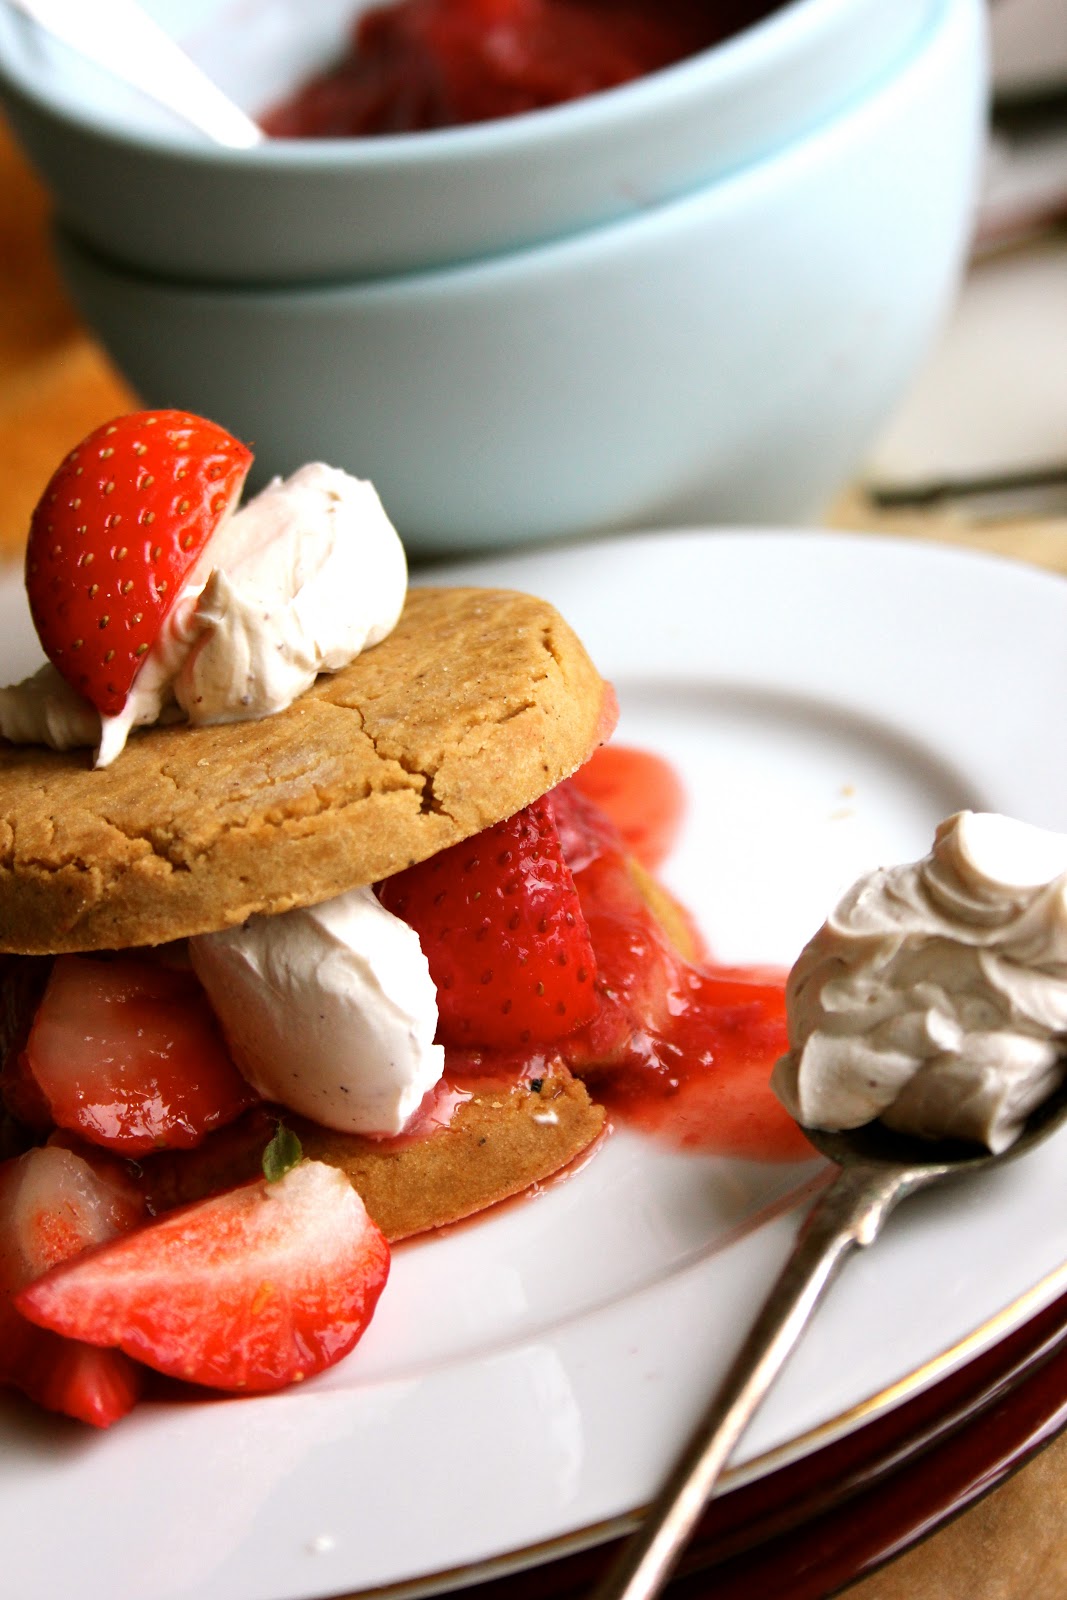
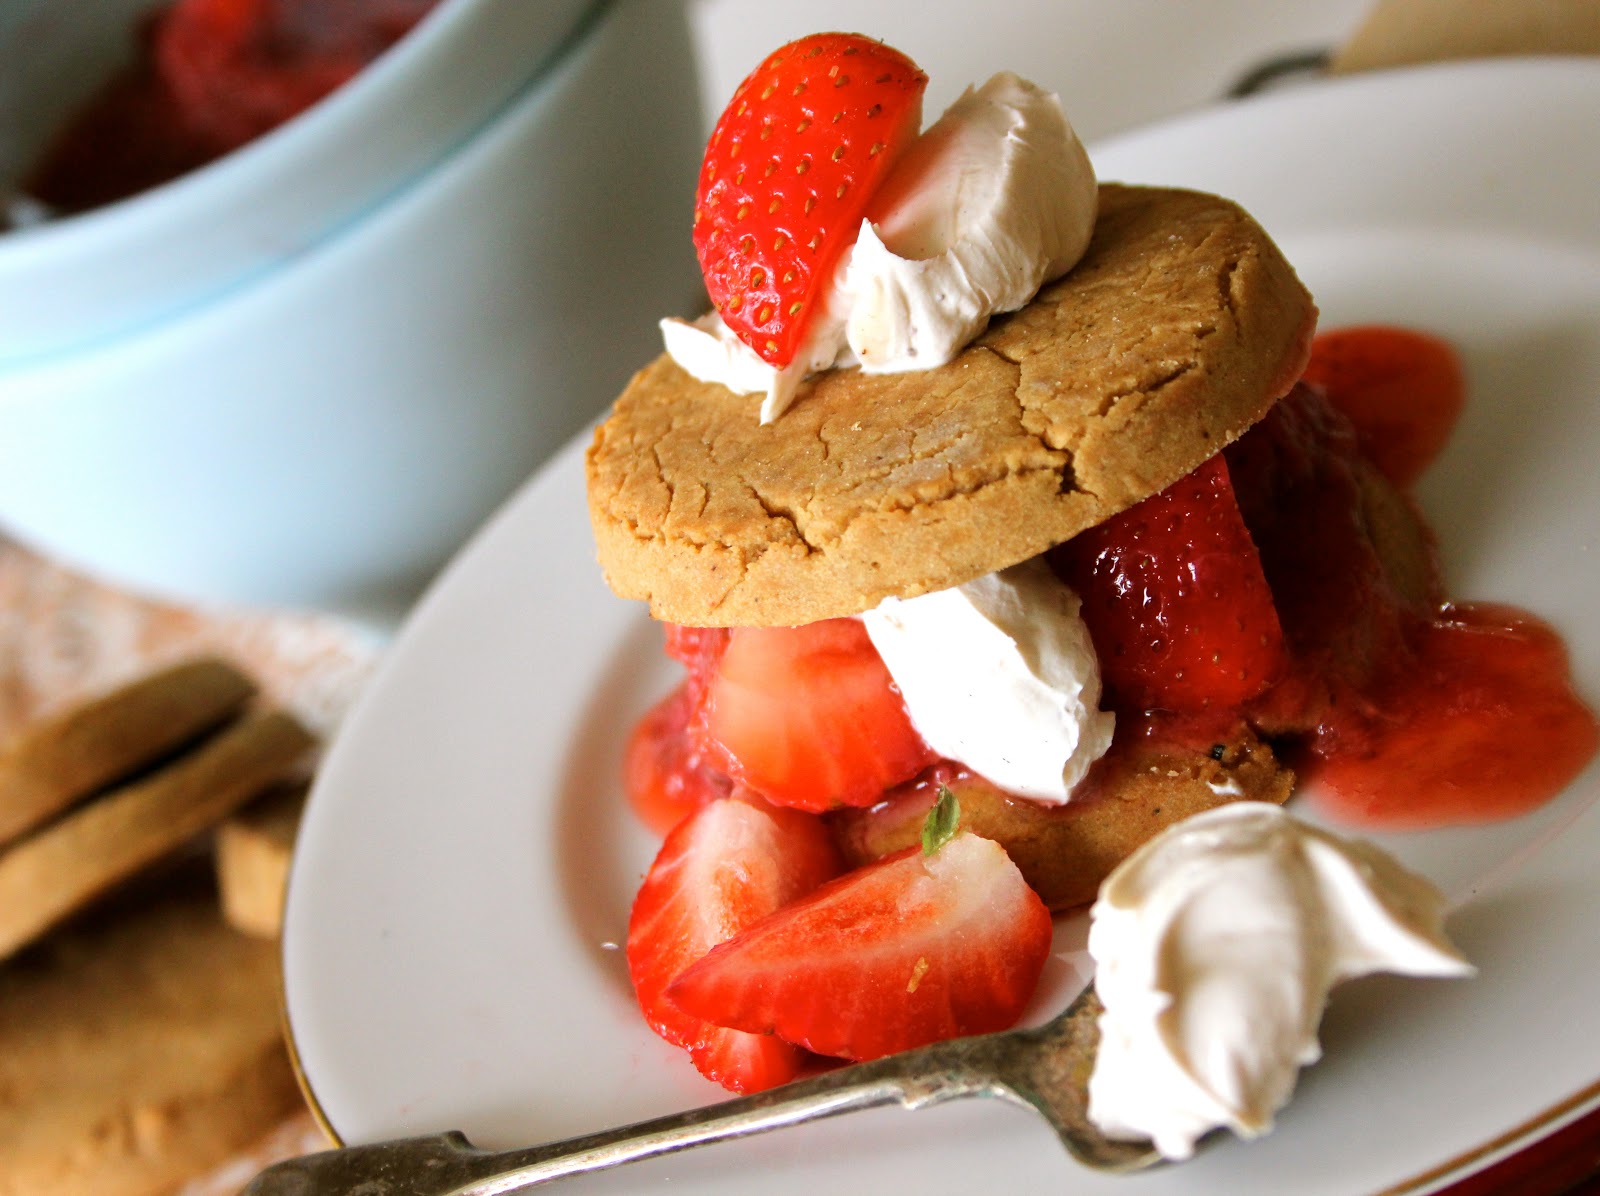
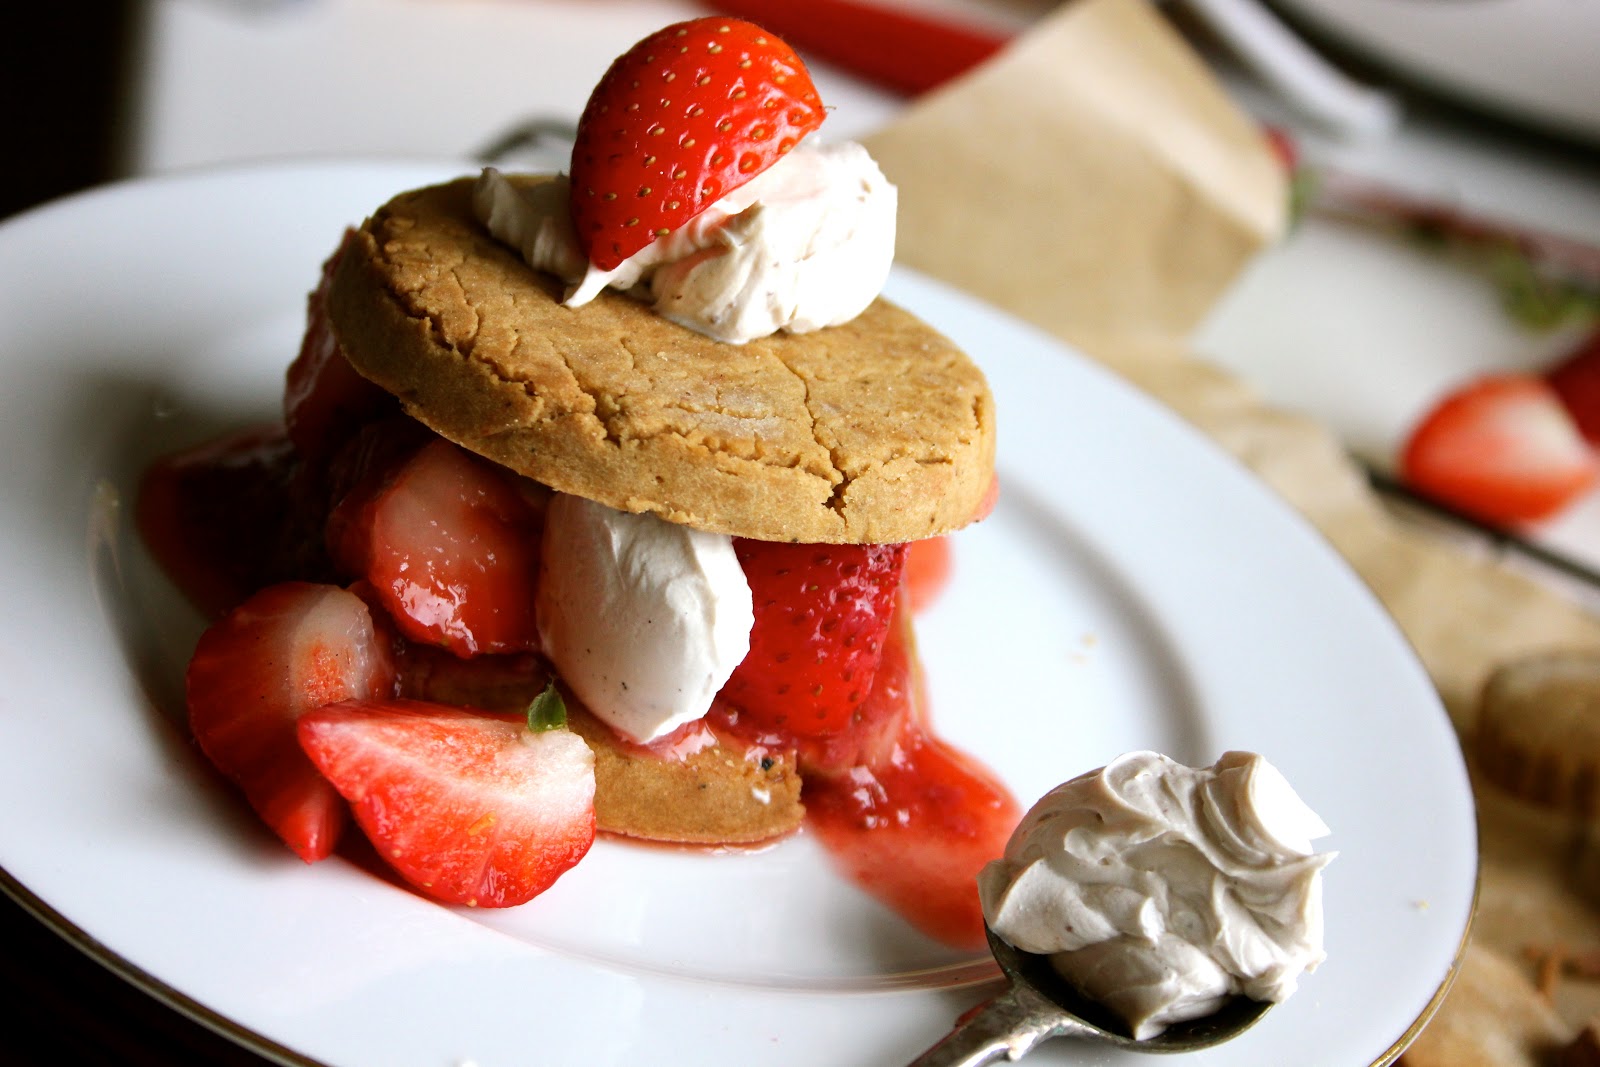
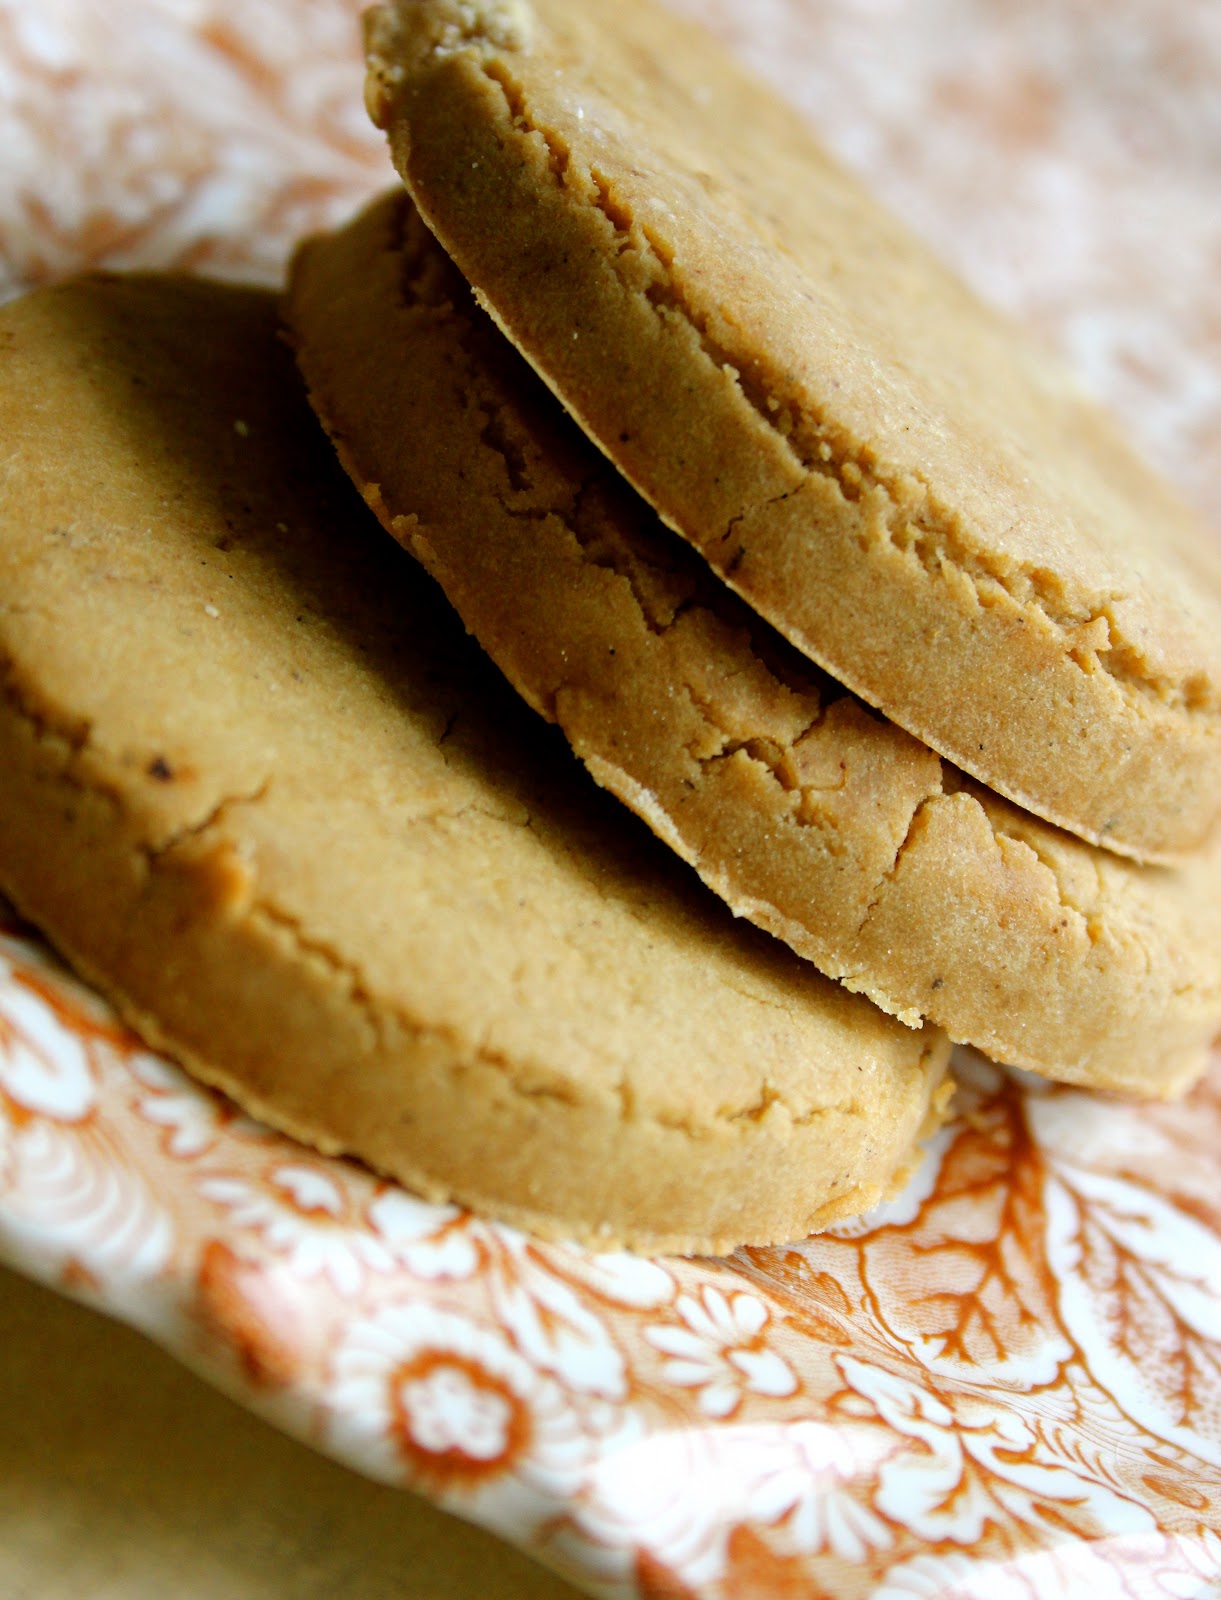
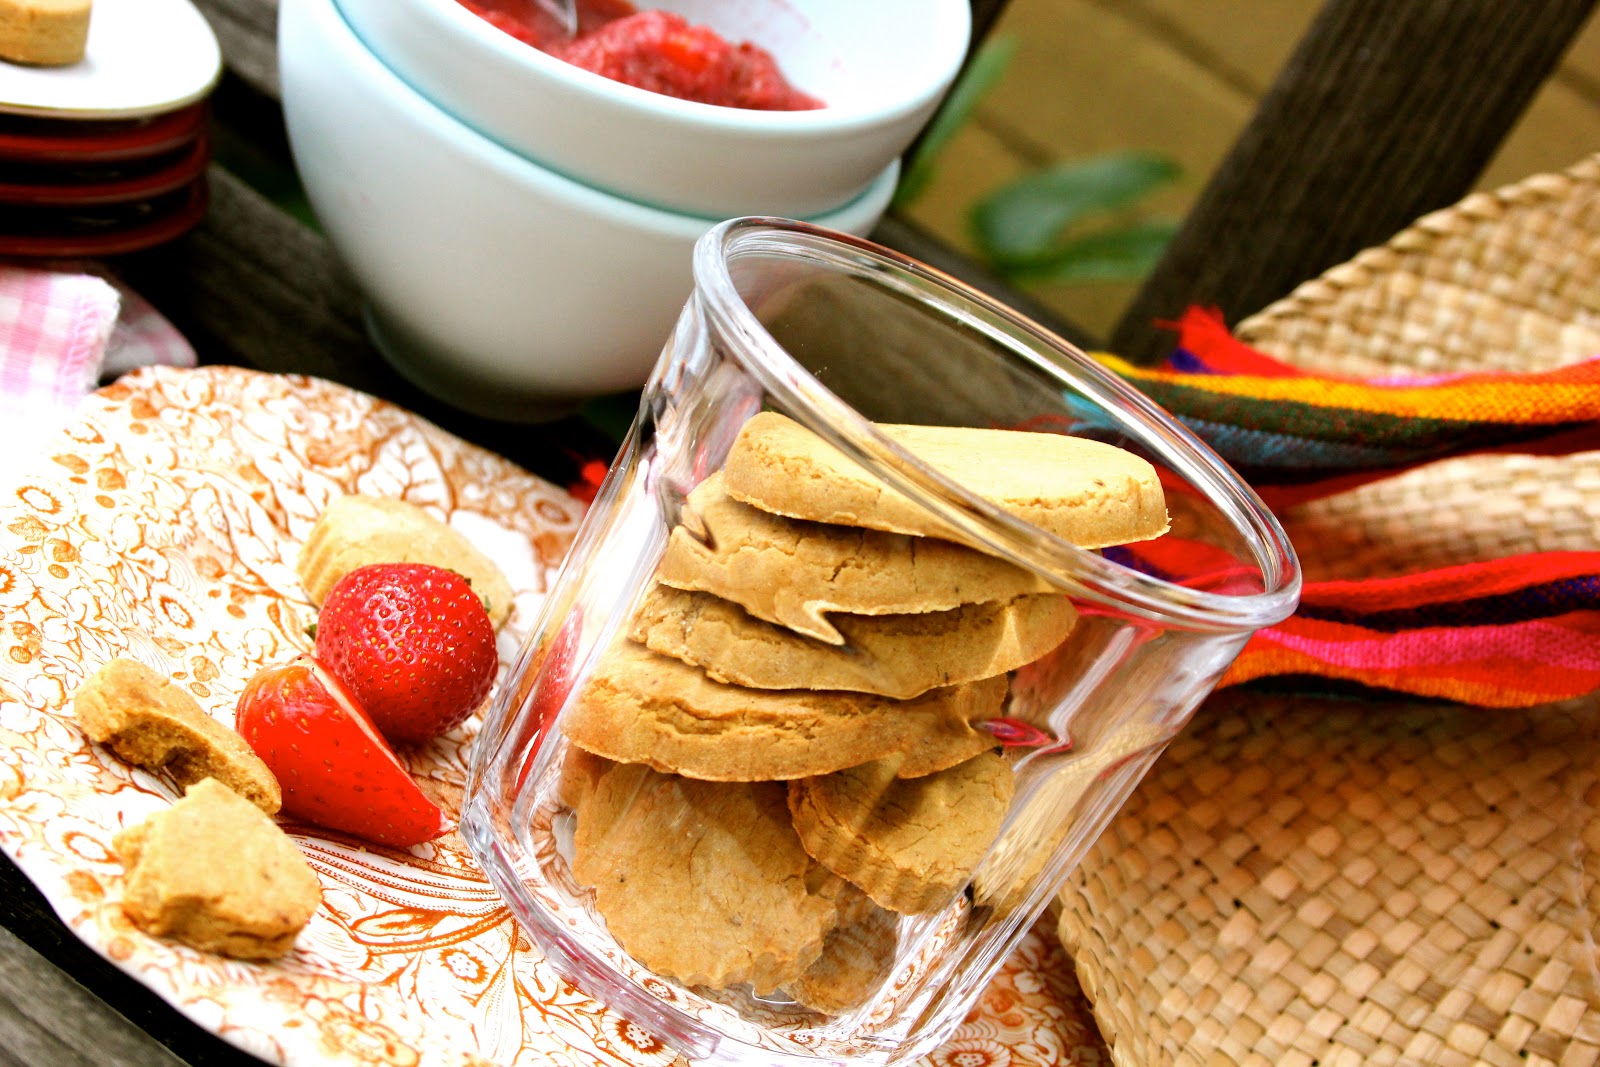
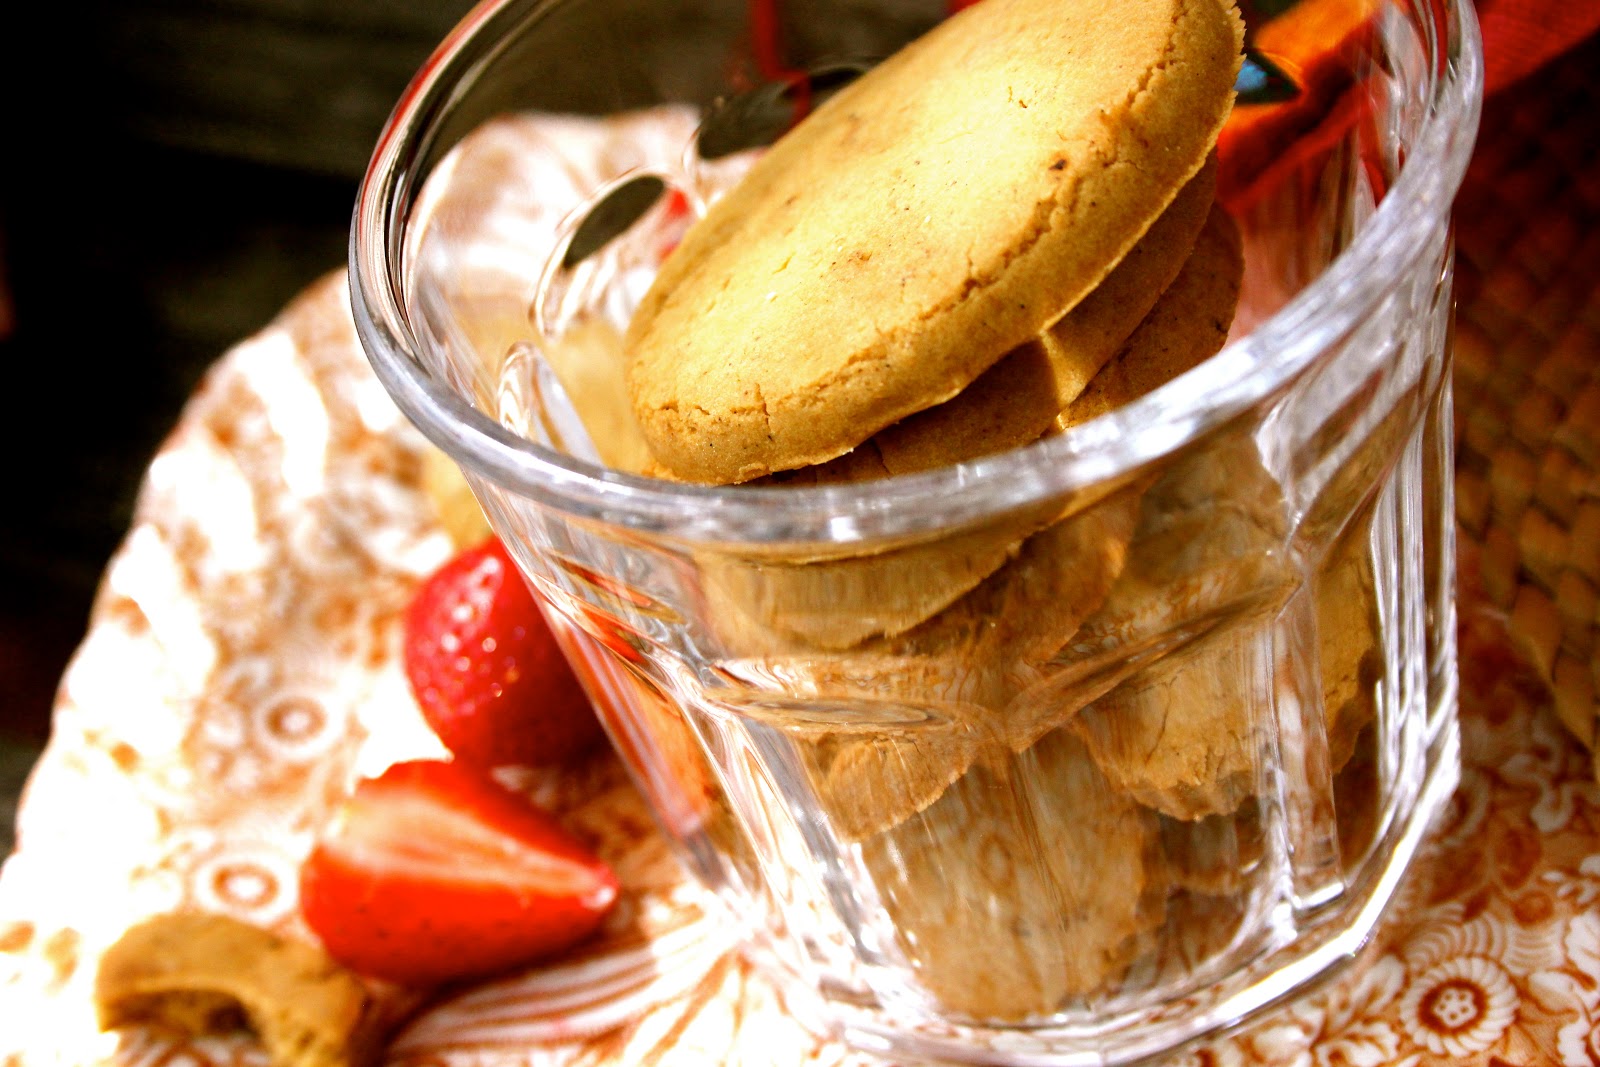
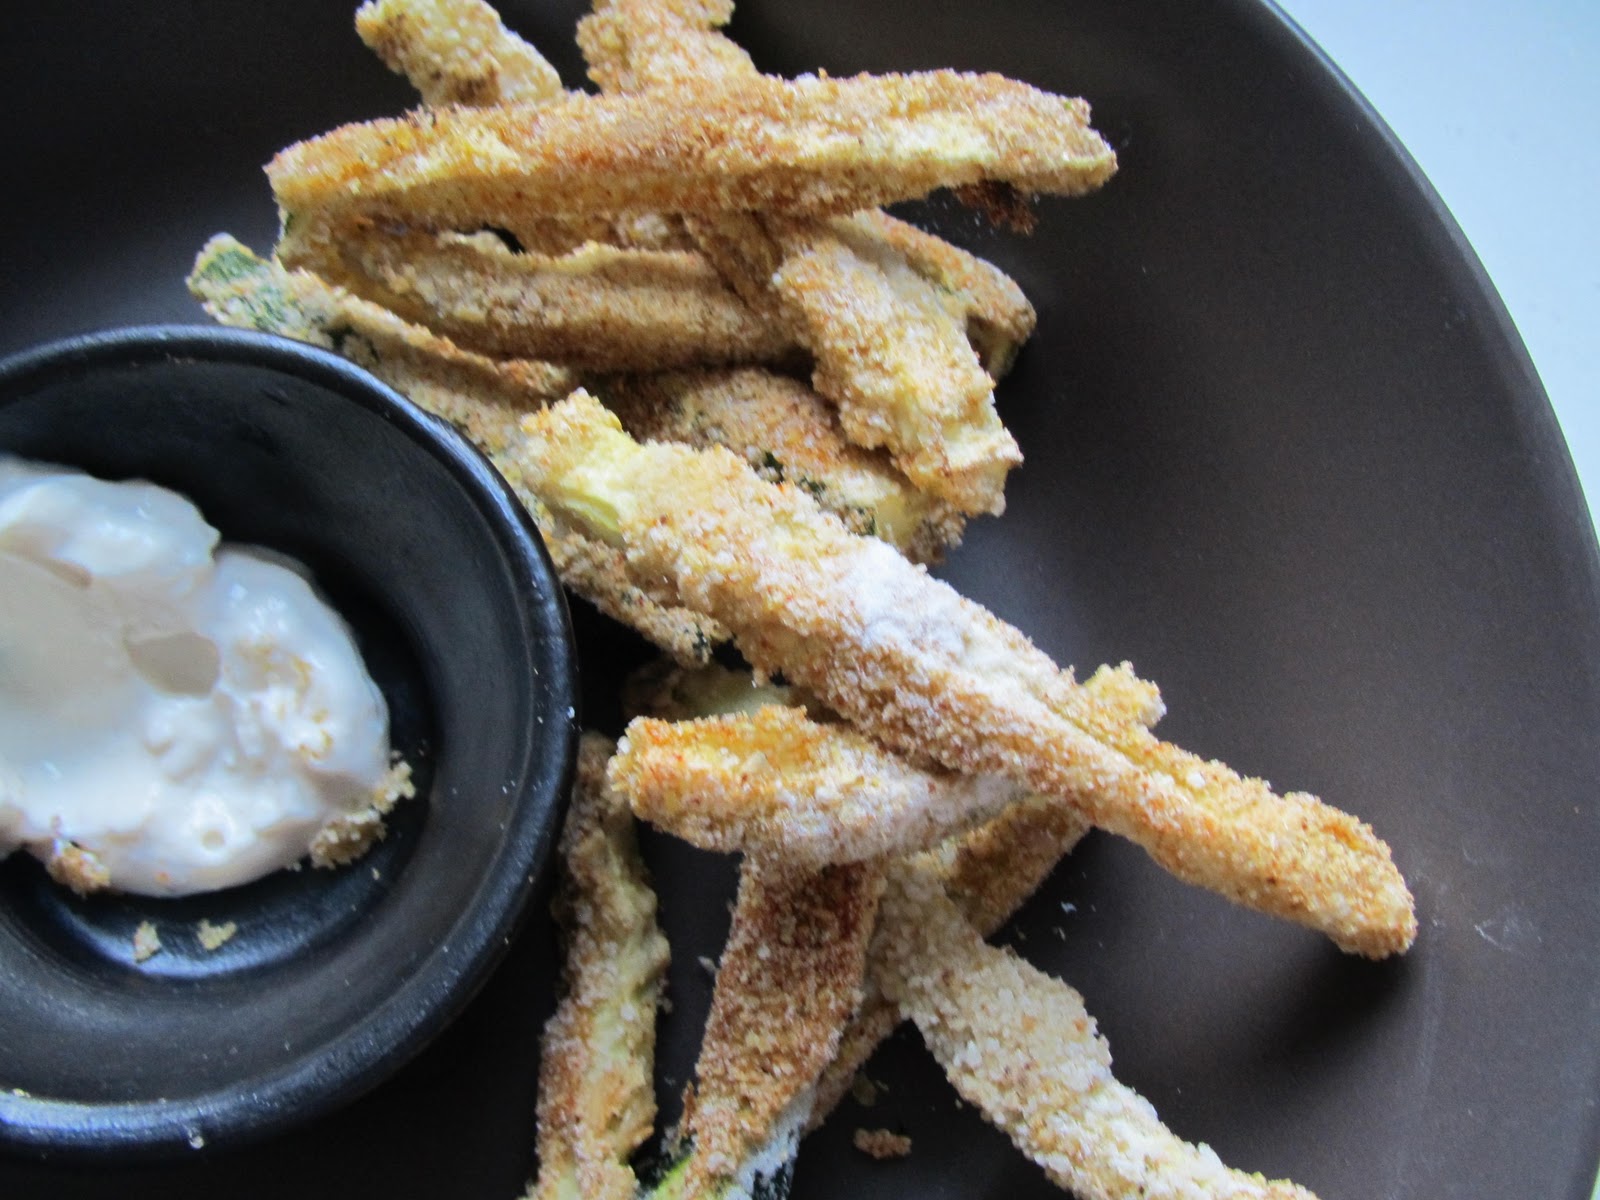
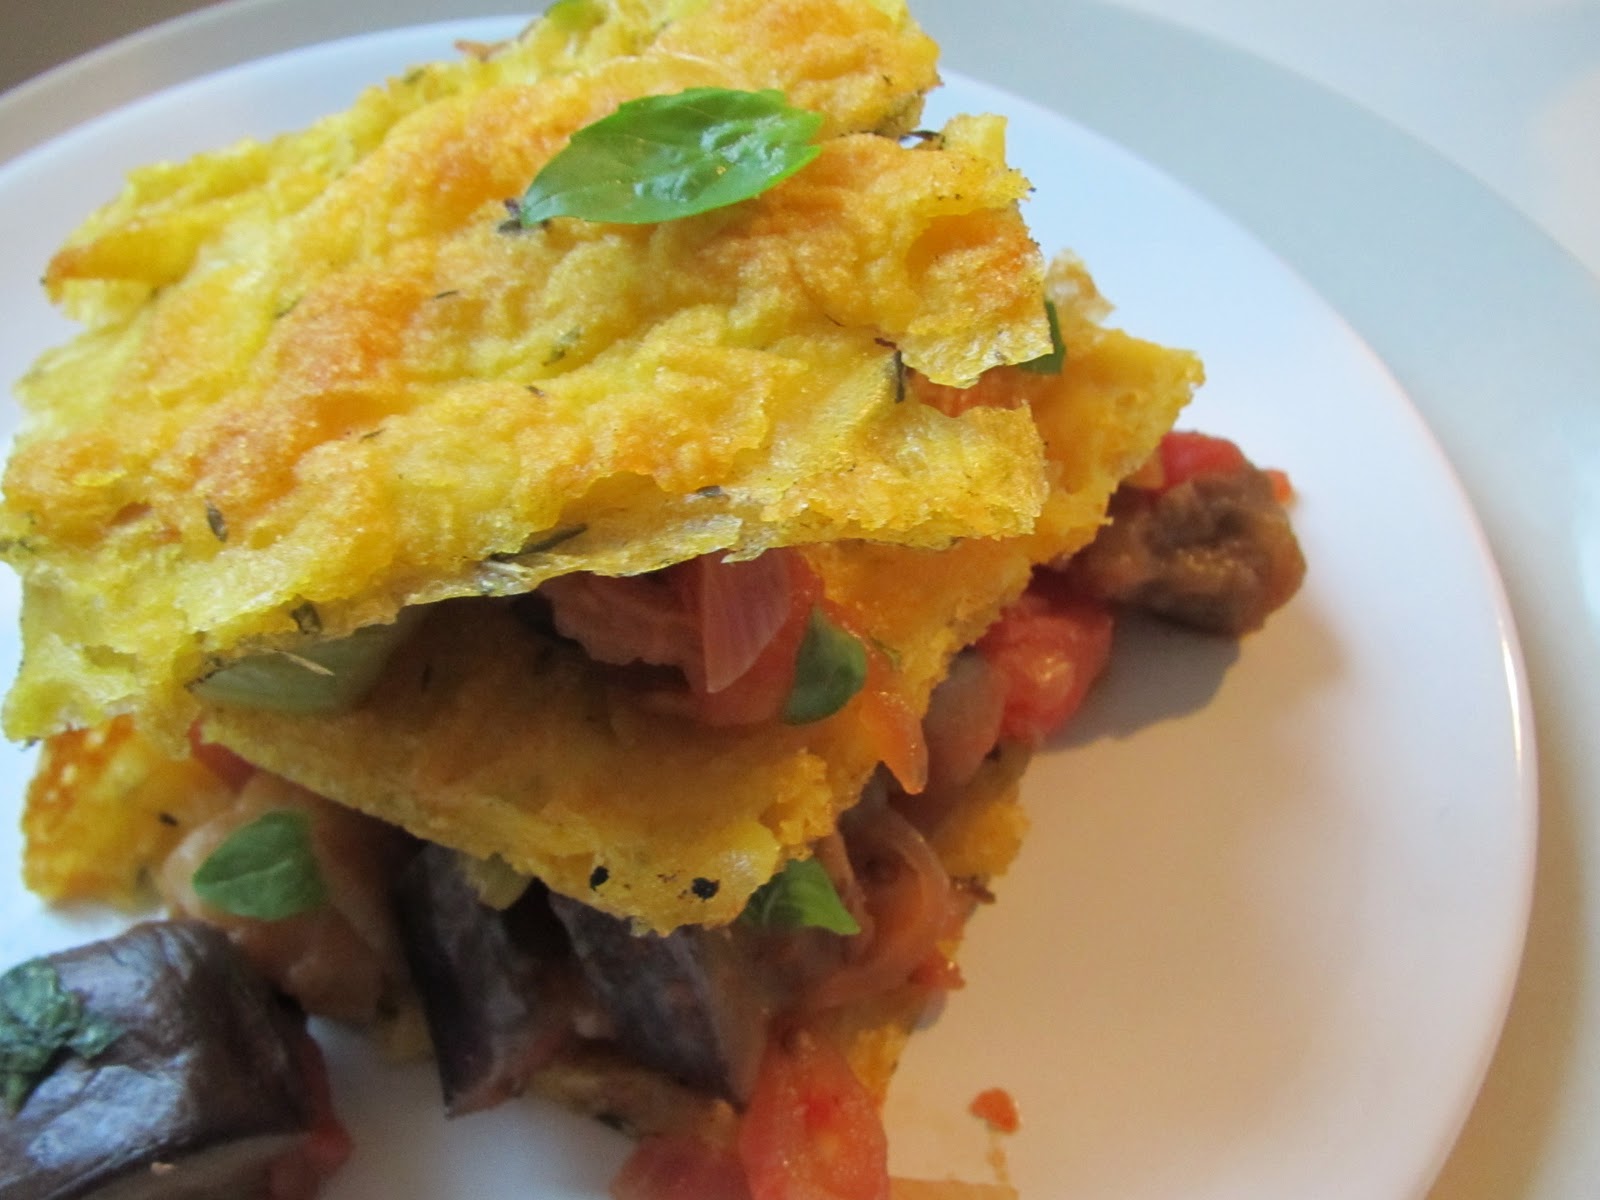
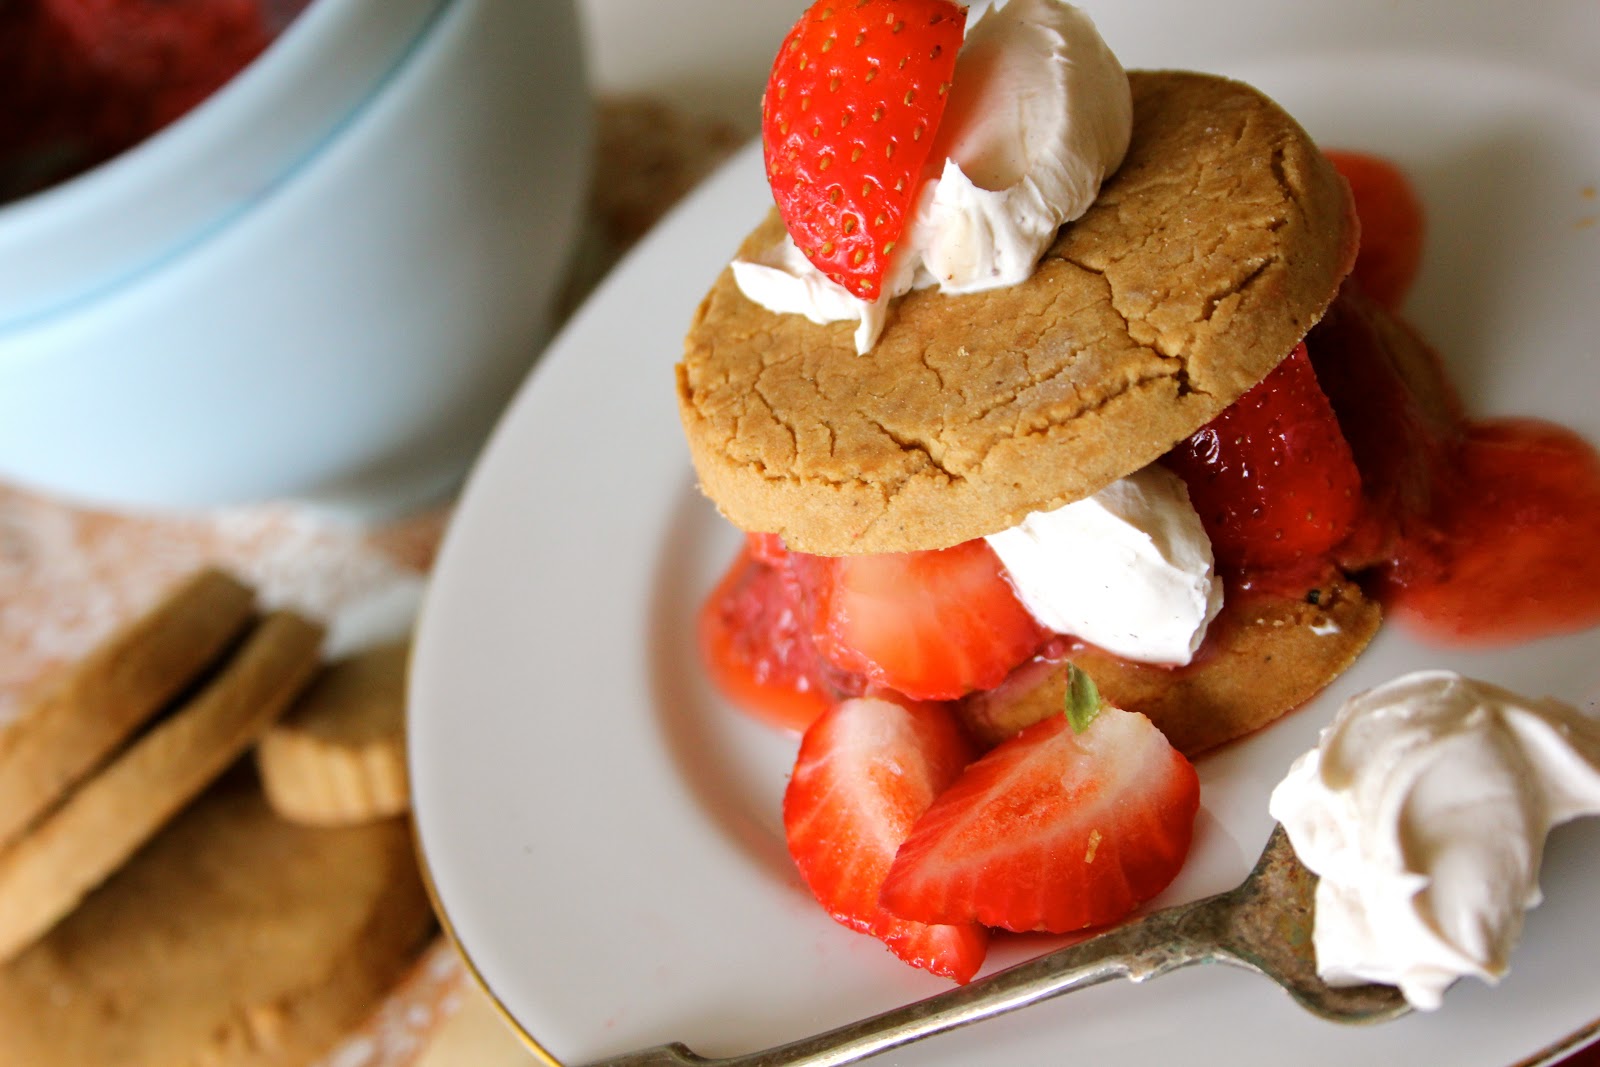
My changed up, gluten free, egg free and dairy free scones. Baked with rich caramely, coconut sugar for a golden scone.  I used stevia too, to make it low calorie and Low GI.


Cherry Scones
makes 8 scones

ingredients
1 3/4 cup flour
1/4 cup sugar ( 2 tbs coconut sugar & 2 tbs stevia)
2 tsp baking powder
1/2 tsp baking soda

5 tbs vegan butter
1/2 cup non-dairy milk

1 tsp vanilla powder
4 tbs dried, fruit sweetened cherries
1/2 tsp salt

glaze
4 tbs stevia powder (use your coffee grinder)
water or non-dairy milk
method
preheat oven to 200 degrees

1.sift the flours, salt and baking powder/soda into a large mixing bowl.  Add the sugar and vanilla powder. Drop in the dried cherries.
2. chop in the chilled vegan butter with a knife.  Cut in the fat until it is the size of garden peas, or those sherbet pips that made you hyper when you were a child.  
3. pour in the chilled non-dairy milk.  Mix lightly until incorporated and can form a dough.
4. put the dough onto parchment paper, on top of your baking sheet.  Pat or roll to a circle about an inch thick.  Use a long sharp knife or pizza cutter to cut to 8 triangles.  Pop in the oven. Brush tops with a little non-dairy milk. Bake 18-20 mins, until slightly golden.  Remove, and gently pop onto a baking rack to cool.  Don’t touch until cool (helps to hold them together).  They are wonderfully sweet & crumbly.  You can use a 1/4 tsp xanthum gum if you want them to hold together a bit more boldly.
4. make the sugar glaze.  Powder the stevia in a coffee grinder.  Mix with enough water to make  a slightly runny paste.  Drizzle with all the artistic flare you can muster.


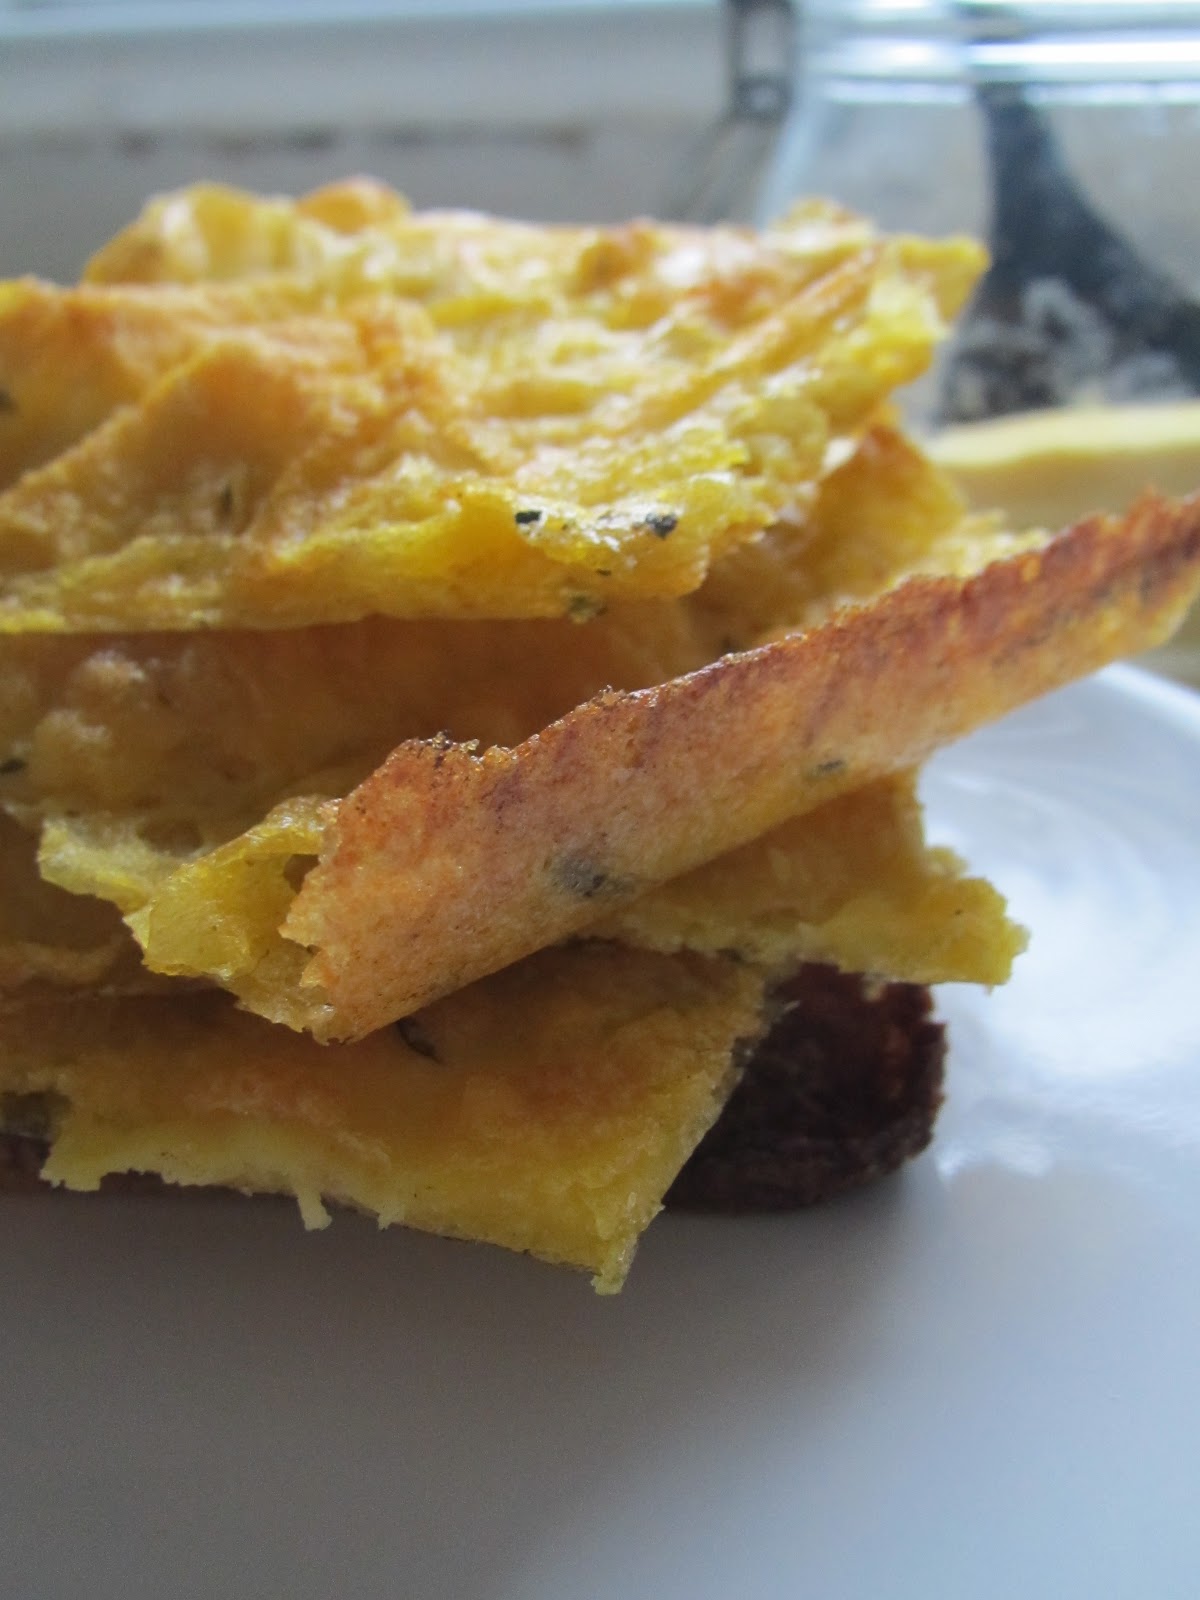
My mother had been bemoaning the boring breakfasts she’d been making for years (she does tend to stick with what she knows…for years). I took a tub of the scones with me when I visited her this weekend.  On Saturday morning I presented her with my fresh homemade scones and she scoffed them with gusto, alongside her morning tea.  She’s already wanting more and getting all creative with it.  What have I unleashed!  Next time she wants walnuts baked inside with ‘fresh’ cherries.  So demanding!
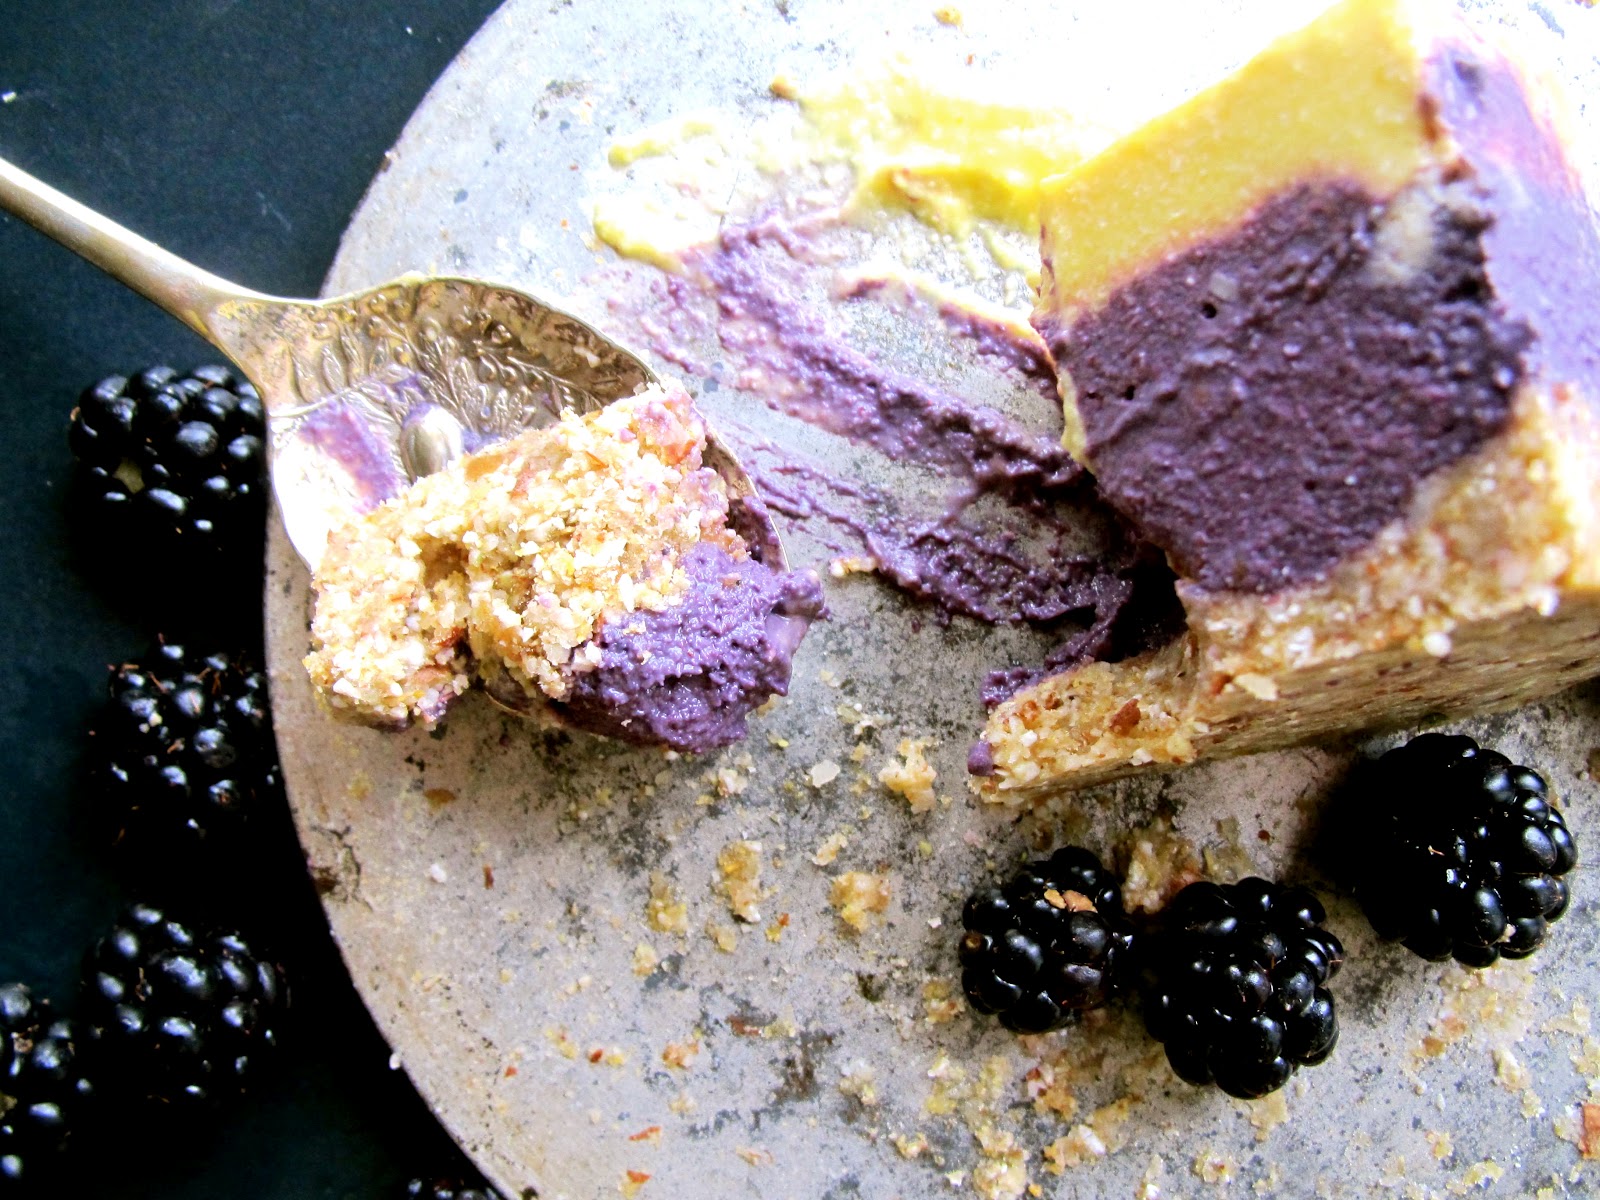
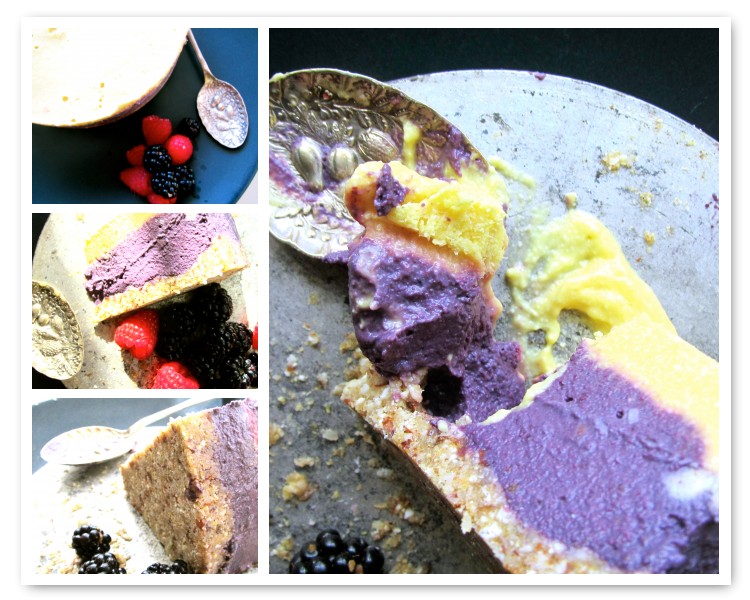

Filed Under: Desserts & Sweets Tagged With: bakes and cakes, cherries, cherry, dairy free scones, gluten free scones, HOME, Recipes, secret recipe club, Vegan, vegetarian

7 Layer Italian Rainbow Cake - NO BAKE - [Recipe]

June 17, 2013 by India Leigh

7 Layer Italian Rainbow Cake – NO BAKE – [Recipe]

From the brink of disaster.  I was already writing the blog post in my head, to tell you of a kitchen calamity.  Mindful to the fact I’d have to admit that I’d failed to come up with anything edible for this task.  Actually, it felt quite liberating, the idea of telling you I mess up in the kitchen (frequently). 
I’d wanted it to be so perfect, but my doubts began to grow when I was patting down the coloured layers in the glass dish.  They looked so messy. A bit of a ‘dogs dinner’, as my mother would have called it.  I just kept thinking over and over, this is going to look so bad. I carried on compiling though regardless. I put the dish in the freezer to set a bit and went out for a walk around the lane.  The cake was cold but still spongy when I returned and retrieved it from the freezer. Time to top it off.  I poured over freshly mixed chocolate (carob) and watched it catch the cold. The glossy liquid took on a matt sheen as it hardened into a crisp, thick layer. It was complete. My knife was warmed to make it easy to cut into cake.  But alas, my frustration increased. Instead of sharp squares, the surface fractured and shards ascended like nudged icebergs! I was so mad!  But, I thrust on.  I had to have something to show.  Something is better than nothing, right?! I gently eased a wedge from the dish and plated it.  I took a slither of excess from the side to taste it.  My hand flew to my mouth.  It was delicious!  I couldn’t believe it. It may not be a looker but it was sure tasty. O ye of little faith!

I was so happy. I had something to enter for  The Secret Recipe Club! Debbi our group’s commander had assigned to me  The Avid Appetite.  It was up to me to spy on the blog, unnoticed and hack one of its recipes.  What can I tell you about the writer behind the blog? I know her husband’s name is Shaun.  I know that in 2010 she couldn’t cook a bean.  I know that her and her man click over their love of food.  And her name?  Couldn’t find it anywhere.  Avid?  Let’s call her that, for want of something better.  She writes a great blog, natural and chatty in style,  and has a loooong list of recipes.   When I saw the photograph of her beautiful 7 layer Italian Rainbow Cake, I knew I’d found the dish I was going to veganize and enter for this month’s Secret Recipe Club assignment.  Actually, Avid called them ‘cookies’ but I can’t get my head around that.  It doesn’t look like a cookie to me.  So cake it is.  

My version is sweet (but not overly so) ooeey gooey, light but rich at the same time (no, I don’t know how that is possible either). The layers each have a personality of their own. The thick roof of chocolate (carob) gives a wonderful paradox to the moist sponge, and slightly sharp sweetness of the apricots.  I tried it out on a couple of friends.  ‘M’, said it was a bit of a sensation.  ‘A trip’.  ‘My tastebuds are firing all over the place’ he said.  Praise, I think.  

It has nothing artificial in it. Virtually raw. The colouring comes from organic veggies. If you want to be super healthy then follow my recipe.  If you don’t have a juicer then use food colouring, as Avid did in her recipe.  Original recipe here

This recipe is egg free, dairy free, gluten free and vegan.

7 Layer Italian Rainbow Cake

the sponge
4 cups almond flour (I made my own from almond pulp, leftover from making almond milk.  If you don’t do that, you can buy yours pre-made)
Juice of 2 cups (approximately 100g) organic spinach lightly packed
Juice of 2 peeled beets (beetroot) (approx 2 tbs of juice)
3 tbs coconut oil
1/4 cup agave 
2 tbs stevia or xylitol powder (grind the granules) (minimises the calorific value, also too much agave would make mix too moist)
1 tsp lemon oil
1 tsp almond oil 
1 tsp vanilla powder
1/2 tsp salt

the apricot layers
Use fruit sweetened apricot jam, or (if you have the inclination) chop and soak organic dried apricots in warm water and then blitz in a blender to a smooth pulp).  add 1 tbs of lemon juice if needed to balance the sweetness.

the chocolate (carob).  
I keep calling it chocolate as it looks like chocolate and I know some find carob not so pleasant as chocolate, or might not even know what carob is.  Anyhow, I am a fan and I’m calling it ‘chocolate’. 
1/2 cup carob or cacao powder
1 tbs coconut sugar (use a little more if using cacao powder as it doesn’t have carob’s naturally sweet quality)
1/4 cup melted coconut oil 
1/4 tsp salt

Mix the almond flour with the xylitol, agave, vanilla powder, salt and melted oil.  Have 2 additional bowls at the ready and eyeball the mix to be distributed evenly between the three bowls.  Add the spinach juice to one. The beet juice to another, and leave the third one as it is.  To the spinach mix, add the lemon oil, to the beet mix add almond oil.  Mix to incorporate.  It is all becoming so divinely fragrant at this point. 
Have your square cake tin ready at this point (in a perfect world I’d have had a suitable cake tin but I used a glass dish instead).
To assemble the 7 layers..
Layer 1 green mix. Layer 2, a slathering of apricot jam. Layer 3 plain mix. Layer 4 another slathering of apricot. Layer 5 pink mix. Layer 6 apricot. Layer 7 chocolate (carob).  Gently pack the almond flour layers down.  Careful when spreading over the jam (I know, mine looks a bit of a mess, but I was being careful.  Yours may turn out prettier!)
Freeze or chill for an hour when you get to layer 6.  Then pour/spoon over the carob topping.

Velato!  Italian 7 layer rainbow cake.

Thanks to The Avid Appetite for the inspiration.

Filed Under: Desserts & Sweets Tagged With: cake, dairy free, egg free, gluten free, HOME, Recipes, secret recipe club, sugar free, vegan desserts

World Baking Day & My Return To The Secret Recipe Club

May 20, 2013 by India Leigh

World Baking Day & My Return To The Secret Recipe Club

My recent trips to Buenos Aires, Mexico and the US have made me absent from the Secret Recipe Club for months.  I’ve missed the SRC band of bakers! 
Life, right now, is a bit..fluid.  Though in the UK, I’m still not settled.  I miss my kitchen.  I’m living life from a suitcase.  There seems too many things to do and think about and conjuring up new recipes has, involuntarily, been put on the back burner.  The SRC is forcing me to focus.  This is good!  World Baking Day is making me very keen to get in the kitchen too.  Time to bake!

I was assigned the blog of two business partners, Serena Ball and Deanna -  Teaspoon Of Spice .
 The gals are registered dieticians who specialise in nutrition messaging, with a culinary focus.  Serena is  a bit of a cheese fan.  She searches out Illinois cheese makers with her husband and four children. She encourages everyone to try a new recipe or flavour every week.  (I wonder if they’ve tried aged tree nut cheese, like this one by Dr. Cow ?)  Deanna stays inspired to be creative in the kitchen for her husband and young daughter.

I enjoyed poking around in their virtual recipe library whilst hunting for a dish to try for the Secret Recipe challenge.  I was all set to make a vegan version of their Cucumber Avocado Soup with Moroccan Chickpeas and then I spotted their shortbread with rhubarb.  It being so close to World Baking Day too, I couldn’t resist.  Serena and Deanna both write of their fond memories of a childhood where rhubarb was grown by their fathers and was an oft used ingredient.  I thought their Light Strawberry & Rhubarb Shortcake looked like it could become memorable for me too.  The rhubarb is full of Vitamin C, Vitamin K and a great source of fibre.  Their recipe is not vegan though, so I changed up the Original recipe. 
The fragrant, blushing strawberries brightened up a (typically) dull sky, English day.  I made shortbread instead of shortcake as I wanted the juxtaposition of the silky fruit compote and the cool melt-in-your-mouth vanilla cream cheese to the firm snap of the buttery shortbread.  Not only is it dairy free but it is gluten and sugar free too. I hope you enjoy it! 

Summer Strawberry & Rhubarb Shortcake 


Compote
1 stick of rhubarb
2 cups sliced fresh strawberries
1/4 cup water

Vanilla Cream Cheese
Tofutti Original Cream Cheese
Vanilla extract (I use Baron, it adds a sweetness of vanilla and is alcohol free)
Pure Vanilla powder.  (I buy mine from a great little stall Borough Market in London, it has all manner of wonderful spices and herbs)

Shortcake1/2 cup of vegan butter
1/4 cup coconut sugar
6 drops culinary lemon oil or 1 tbs fresh zest
3/4 cup brown rice flour
2/3 cup potato flour
1/4 cup besan (chickpea) flour
1/3 teaspoon pink salt

Ready? Here we go…

Step 1 - Making the Shortbread
Add lemon oil (or zest) to sugar and butter and cream together.

Step 2
Sift the flours and salt.

Step 3
Gradually add the dry mixture to the creamed butter until just combined and forms a dough. 

Step 4
Cover and chill in the fridge for at least 4 hours (or overnight) (or pop in the freezer for an hour)

Step 5 - Making the compote.
Make the sauce.  Chop fresh strawberries into four and the rhubarb into 1 inch cubes.  Pop into a pan of 1/4 cup water and simmer with lid on for 10 minutes.  Add 1/2 cup fresh strawberries and leave to cool. If your strawberries are beautifully ripe you shouldn’t need to add any sweetener.  If not then just drizzle a little agave syrup or stevia to taste. The sauce can be made the night before and chilled (remove from the fridge and hour before serving to bring to room temp). 

Step 6 - Rolling out the shortbread. 
Preheat oven to 350 degrees. Remove your dough from the fridge and place onto a flour dusted surface.  I usually roll mine on floured baking parchment. (easier clean up and sticks less)


Step 7

Gently roll out the dough to 5-6mm thick. Have a parchment lined baking tin ready. Use a cutter or, as I did, a glass with 3.5inch diameter, and cut out your biscuits (or for my USA friends..cookies) Lift the shortbread on to the baking tray.

Step 8
Pop into the heated oven.  Bake for 15 mins.  Remove from oven and leave to cool on baking sheet for 5 mins before gentle transferring to a cooling rack and (try) to leave them rest for a further 10 minutes.

Step 9 - making the cream cheese
Put the contents of the tub of cream cheese into a bowl.  Pour on 1 tbs of vanilla essence (1 tsp if yours in concentrated..do it gradually, to taste) and sprinkle over your vanilla powder.  With a spatula, mix to incorporate the black specks of powder and the carmel coloured essence.  

Step 10 - Putting it all together.  This is where you exercise your artsy side!
Assemble on pretty little plates.  Shortbread.  Spoon over the cooled sauce. Make tiny quenelles or just dollop four beads of sweet cream cheese.  Pop on another shortbread biscuit to make a little lid or hat.  Spoon over a little more sauce and add a few fresh, chopped strawberries.  Sprinkle over a pinch of coconut sugar.  Add a quenelle of cream cheese on the top and serve.


Check out all the other players in this months Secret Recipe Club too, right below this post.

Filed Under: Desserts & Sweets Tagged With: allergy free baking, gluten free vegan, HOME, secret recipe club, shortbread, sugar free, summer desserts, vegan baking, World Baking Day

Raw Berry & Tang - 2 layer Cheesecake

September 17, 2012 by India Leigh

Raw Berry & Tang –  2 layer Cheesecake


September (??) how did that happen?  I still want to be surrounded by summer!!!  It came so fast, hardly time to blink before it was Secret recipe club time again.
Once again I was given a link to a distant foodie. To then poke around, under cover of darkness, to covertly trawl through recipes that made me drool. To then choose one to recreate in my home.  Really, when you think about it, it’s a bit like teleportation.  Well, I’m finding something, then bringing it to life hundreds or even thousands of miles away.  Also, for good measure, it is time travel too. Hear me out.  It’s like… the Big Bang occurs in one kitchen, and then, months later, the outfall from that, reaches here.  So, recipes are like me, standing on my patch of grass and looking at stars…..well a little bit anyway (ahem..I think it’s the sugar rush..gone to ma head!)

Chelsy from Mangia (means to eat in Italian…she’s Italian…well actually from Texas, but the roots…they are Italian) had no idea I was snooping on her kitchen activities.  She has a LONG list of recipes on her blog and boy is she addicted to coconut…and peanut butter!  A moment of warm and fuzzy arrived when I read that Chelsy began cooking gluten free because of her fierce love of her little sister, who suffers from celiacs disease.  Ahh, the Italians family bond is certainly strong.

I was tempted by so many of her recipes.  Happy to see lots of vegan and gluten free bakery bites that I had no need to veganize.  Sugar free too!  Easy breezy.  I toyed with making the Lavender Vanilla Bean Scones then definitely decided to make the Apple Pie Breakfast Cakes before actually recreating the Raw Blackberry Cheesecake.  It looked so good.  I also couldn’t help myself and made her chocolate dipped biscotti (gluten free sugar free vegan) too.  I didn’t add the oats and I used carob instead of chocolate and they turned out with a nice hard biscotti bite and were lovely.  I packaged them up in brown paper wrap and a mauve straw tie, and delivered them to a friend for her birthday.

The cheesecake was relatively simple to make, and I complicated it by adding another layer to the cake.  Of course, you don’t need to do that.  I used the ingredients I had to hand.  I picked more berries than I needed so I could freeze the surplus and make a blueberry and apple crumble next week.  Yay, for autumn and ‘crumble’ season (those of you in the USA call it ‘crisp’).  Same thing.

Raw Berry & Tang Cheesecake


Ingredients


base
1 c sprouted and dehydrated raw buckwheat
1/2 cup almonds soaked overnight and rinsed (or just use pre made almond flour)
2 dates (soak them a little to soften)
1 Tbs melted coconut oil
1/4 tsp salt

blackberry layer
1/4 cup agave or coconut syrup
I cup cashews soaked over night and rinsed
1 cup freshly picked blackberries
1 Tbs melted coconut oil
1 tsp fresh vanilla powder
pinch salt

mango & passionfruit layer
1 small mango.  peel and cut flesh away from the stone
1/4 cup cashews soaked over night and rinsed
2 Tbs passionfruit juice (push through a sieve to separate the pips…they are way too crunchy for me and my dentist already very rich)  3 whole passion fruits yield
a few drops of lemon oil, not essential but it elevates the zing a little
pinch of salt


Method

base
1. put all ingredients into a blender and blend until a dough starts to form.  Press mixture down into bottom of a springform pan and pop in freezer whilst preparing other layers.

blackberry layer
1. put all ingredients into a blender with exception of coconut oil and blend until smooth then slowly pour in the oil.  This prevents curdling and makes it so silky.
2. pop the mixture on top of the base and pop back into freezer again to set.

mango passionfruit layer
1. just do the same as the blackberry layer.

Pop in the freezer to set for about an hour. Remove 10 minutes or so before serving.


Here is the biscotti - Chelsy, I think you’d be proud!


Well, that is Septembers Secret Recipe Club done.  Now to await the reveal and see what everyone else made, AND who got me as their ‘secret’ recipe pal this month.  Why don’t you come join us!

be well

India Leigh xx


Filed Under: Desserts & Sweets Tagged With: biscotti, Blackberry Cheesecake, gluten free, HOME, raw dessert, Recipes, secret recipe club, sugar free, vegan desserts

Sublime Arctic Grasshopper Pie

July 23, 2012 by India Leigh

Sublime Arctic Grasshopper Pie

It’s  The Secret Recipe Club time again. How’d that happen?!  It has come back around again so quickly.  I am convinced time is speeding up!  As they say, ‘my life already’!   Less ‘manana’, more ‘eck, hurry up love’, is called for.

Delving around the blog of this month’s secret recipe buddy - enter Jamie from Our Eating Habits, I get the feeling, time isn’t snapping at her heals in the kitchen.  If it did I think she’d beat it back with a wooden spoon.  Nothing is stopping this girl from having fun in the kitchen.

The SRC is good at keeping me from tunnel vision when it comes to food.  Being a vegan, I do tend to have my Internet homing pigeon set to ‘plant-based recipes’, but having a blog assigned by our hostess Angela, to poke around by someone else, I get to spy on recipes which probably wouldn’t normally be in my sights.  For instance, I wouldn’t put ‘grasshopper’ into a Google search box, unless I was researching natural history, or say, old cult classic karate films.  Definitely not in relation to food anywho.  Jamie has a zillion (well, an exaggeration..she’s just a few shy of that) recipes on her food blog.  I saw Grasshopper Pie and I was curiosofied!  Not like some sicko, leering at something forbidden, more like the 7 year old tomboy in me spotted it next to ‘Worms and Dirt’ and got the whiff of fun in the air.  It had been raining for three and a half months straight in England, I needed all the fun I could gather!
The first viewing of the ingredients list alone were almost enough to put lil’ ole Miss Purity Pants into a hyper blood- sugar rush!  After blowing into a brown paper bag to stave off hyperventilation, I threw on my red satin ‘veganize’ cape and spun into action.  I wanted whipped….minted….choccywokky…creamy…. and coooool!  A la Vegan.    Cupboards banged, scooping spoons were dirtied, the sink filled up with an assortment of bowls.  Coconut oil was eaten straight from a spoon (and rubbed onto elbows to nourish my sun-poor, winter skin)….and  VOILA!

Creamy Supreme Arctic Grasshopper Pie

Ok, it isn’t green, more your ‘albino’ green, but it is really, really minty.  It smells like green. Tastes like green.  I’m guessing that is why they called it grasshopper pie in the 1950’s, when those jive bopping Americans invented it.  Or was it because the Creme de Menthe had those crazy quiffed haired teenagers hopping all over the place?  My loves, we may never know.
What I do know is it has more Medium Chain Fatty acids (MCFA’s) than you could shake a stick at!  Closest to that of mommy’s milk = good for you.  Unlike saturated animal fats, MCFA’s are not readily stored in the body but digested as used as human rocket fuel!

Jamie’s original pudding/pie recipe is here.  Her recipe has crushed Oreo’s in them.  I thinking Oreo’s aren’t gluten free, or very vegan.  But if you are not either then…  However, I made a lovely crumb that is just like crushed up cookies.  

                                                                                                                                                   Serves 4

Ingredients

Topping
1 can of full fat Coconut Milk refrigerated (unopened) overnight
2 Tbs xylitol sugar, ground in coffee grinder (or icing sugar if you haven’t quit sugar…yet)
1 tsp peppermint extract

Base
6 dates, softened by soaking
1 tbs liquid vanilla (Asian shops sell BARONS liquid, san alcohol, vanilla), if not use water and vanilla powder
1/4 cup coconut flour (or soaked and drained pistachios or Brazil’s) the coconut flour is high fibre, lower fat
pinch Himalayan or Celtic salt
1 tbs crushed pistachios
2 tbs carob or cacao powder
2 tbs coconut oil - gently melted

Drizzle
1 Tbs carob or cacao powder
2 Tbs coconut oil - gently melted
1/2 tsp peppermint oil
pinch salt

How to

1. for the base, put all ingredients into a blender and pulse until the crumbs hold together when pressed.  Tumble the crumb into a 8inch square dish that you’ve pre-greased with coconut oil.  Press down firmly.  Refrigerate or freeze while you prepare the other ingredients.
2. to make the ‘cream’ filling.  Open up the can of coconut milk, (do not shake or turn over the can) and gently scoop out the unquious white cream (leaving behind the clear coconut water. you can use this in other recipes) and decant into a mixing bowl.  Add the other ‘filling’ ingredients and whisk lightly.  Grab the chilled base out of the fridge or freezer and pour the minty cream over the top.  Pop into the freezer for 1 hour (minimum).

3. prepare the drizzle with the melted coconut oil, the carob, peppermint oil and salt.  Stir until smooth.
4. take the pie from the freezer and drizzle the carob sauce over the pie in a delightfully artful manner (or splosh it randomly like I did whilst muttering mild obscenities and your inefficacy at food decoration).  Don’t take eons either else it will melt quicker than the polar ice caps.  House it back into the freezer for 30mins before serving. 

I would suggest eating this in company if your will power is poor to middling.  Solo consumption is advised with caution.

I also knocked up this ‘pie in a jar’.   I layered filling and the base with chopped pistachio before crowning with mint carob confection.  If you’ve not tried carob then I suggest a little sampling is in order.  Carob is a naturally sweet, sticky legume that is the colour of chocolate, does have any stimulants in it, is low carb and low glycemic and has lots of vitamin D.  It does a rather brilliant job of mimicking chocolate flavour, but because of it’s sweetness it needs little additional sweetener.  Good job, carob!

The cute glass spoon was ‘glass blown’ right in front of my eyes by an old dear physicist friend of mine.  I’d visited to take him to the supermarket but he convinced me to sit in his ‘lab’ in the kitchen and learn to blow glass instead.  Fun times.

Check out the other Secret Recipe Club’s recipes shown.  I love ‘reveal’ day, when all our efforts are uploaded into cyberkitchen, and the anticipation of discovering just who was assigned to make one of my recipes and what they chose.

Thanks Jamie, I had such fun with the Grasshopper Pie.  Your blog has also inspired me to make corn chowder.  My next project, that I am thinking will be a chilled affair.  x 

sugar free, vegan, gluten free, low carb

Filed Under: Desserts & Sweets Tagged With: gluten free, grasshopper pie, HOME, low carb, MCFA's, Recipes, secret recipe club, sugar free, vegan desserts

Cheezy Cauliflower Popcorn - so good it’s criminal!

May 21, 2012 by India Leigh

Cheezy Cauliflower Popcorn – so good it’s criminal!

My target for this month’s The Secret Recipe Club, where members get secretly assigned a cooking blog to recipe test was,  Ma, What’s for dinner?   

Mother to 3 boys, Alex, has transformed her unruly and oft hair pulling, meal times by cooking WITH her children.  Her reason?  Get your children interested in food and they will build up a healthy, long-standing relationship with food.  The result? She’s bonded with her kids in the kitchen, and is inspiring others to do the same.   Isn’t that fantastic?!  Cooking is a priceless life skill, eating well is best imported into the minds of little people from day dot.  It is clear, Alex’s family obviously treasure time spent together in the kitchen. 

When Angie, one of the ladies that make the magic happen at SRC, and also queen of her own blog Big Bears Wife, sent me this month’s secret assignment, I admit to being momentarily stumped.  Alex and I are chalk and cheese when it comes to food choices. Alex’s recipes tend to be heavily meat based. I am a vegan.  I had to pick a recipe to trial and blog about, but I’m all about health and taste without animal products…What to do when faced with a challenge?…..become SOULUTION targeted.   I clicked in and out of several recipes and landed upon Popcorn Balls.   The ingredients list nearly had me running for the hills - butter, sugar, corn syrup!!!   I hatched a plan to discover a way to make these grab and run, treats tasty, quick and GOOD for you. 

 I adore researching recipes online.  Food bloggers are so creative!  This can be especially true for vegan bloggers who think outside of the box.  My poking and clicking unearthed a recipe I thought could use whilst (loosely) keeping to the theme.  No, it is has no sugar, it is not even made out of corn BUT it is good.  Very good.  SO GOOD these badboys are now nipping at the heals of my TOP vegan snack of choice - the KALE chip!

I give you - Cheezy Cauliflower Popcorn!   Yes…believe it. 

Raw Food guru Philip McCluskey was the man who created this recipe and set of bloggers in their thousands to get them some movie snacks.
I kept them raw, but you can do raw-raw and baked too.  They are such fun to make and are VERY moreish!  Allow 1/2 head of cauliflower per person.

I borrowed my friend’s 8 year old to make these with me and their verdict was….’they’re epic!’ (seems to be the new buzz word…better than ‘sick’ I guess)


Serves 2

Ingredients
1 head of cauliflower
4 tbs nutritional yeast
1 tbs olive oil
1/2 tsp salt (or to taste)
Method
1. chop the cauliflower into small bitesize pieces (please do as I say and not as I did and made them too big….I thought I knew better.  Lesson learnt!) and place into a zip lock bag or a plastic tub with a lid or deep sides.
2. add the oil and water to the bag and give it a good shake
3. next put in the seasoning and shake, shake, shake until the florets are  covered and golden.

next - there are 3 ways to do this….

raw-raw - that’s it, you are finished and can snack at will
raw-put onto a paraflex sheet and dehydrate for 5-7 hours
baked - add an additional tbs of oil and pop into the oven for 20 mins.


Ingredient swaps - swap the nutritional yeast for ground nuts.  swap the nutritional yeast for date syrup or maple syrup and ground nuts (grind your own in coffee grinder or high speed blender) so a sweet snack.   Don’t swap, but add - flax meal when dehydrating - so nice, as the flax meal goes all crisp and nutty!

Filed Under: Snacks Tagged With: allergy free cooking, gluten free, good carbs, HOME, low fat, raw food, Recipes, secret recipe club, Vegan

Spying on Janes Adventures in Dinner - RAW appetiser

April 23, 2012 by India Leigh

Spying on Janes Adventures in Dinner – RAW appetiser

Poking around in websites, hunting for clues to the identity and make up of a blogger is one of my pass times.  People watching, but indoors, without a glass or cup of something in hand, and actually without any ‘real’ people.  Well, of course they are real but a high percentage don’t have a profile picture…just proud pictures of supper, donuts with pink frosting, or a close up of a blender, mid-blend. So I try and build stories about people via their recipe listings or their ‘blog roll’ (does only a British person get the irony in that title?).  Mostly, the ‘about me’ tab gives a line or two about the food they like, who they eat it with or make it for, and a bit of back story - pet dog, food persuasion, geographical location.  I’ve been spying on Janes Adventures In Dinner  she’s Canadian, a mom.  She’s about food, she’s about photography, she’s about creative crafting, she’s about ‘giving it a go’ and making life a party. It was my mission to steal (borrow) from her. I had to make sure she didn’t suspect a thing.

The brainchild of this assignment is Amanda Formaro.   Amanda from Amandas’ Cookin set up The Secret Recipe Club so she could have some fun and connect with fellow bloggers, and it was 1 year old this month.  The number of members have shot up.  I love the randomness of of it all.  Each month you get assigned (secretly) a food blogger to be your target.  It’s very random.  Last month I made a Swedish Cake.  It is ALWAYS an inspiration.  It is usually a challenge….being a vegan n’all!  But a welcome one.  I spied some great looking onion and feta pizza on Jane’s blog.  She was waxing lyrical about it.  Here is what I did with it. It’s vegan and, as I’ve just taken delivery of a humming (huge) dehydrator…RAW.

Raw Caramelised Onion on Tomato Flax Bread - totally gluten free!

Ingredients

1 large (tennis ball size or a teensy bit bigger) white onion
4 dates (soft ‘Jasmine’ are perfect, if not soak them for 10 mins in a little hot water)
5 tablespoons Tamari (or coconut amino’s or Braggs liquid amino’s if you are soy free)

Method
1. slice onion into rings (about 1/4 cm thick). Pop into a mixing bowl
2. put the dates (drain them if soaked) in a blender with the amino’s and blend to a paste
3. spoon the paste into the bowl and use your hands to mix the paste into the onion rings so they are all gooey and sticky and covered well.  It smells good already at this point!
4. spoon onto a paraflex sheet or baking paper and put into the dehydrator for about 6 hours, until soft.

You will not believe how good these taste. So many uses for them. A big spoon of the sweet and sticky ribbons of onion on top of some mash would be spoonable nirvana (not the band).

Flax crackers

Ingredients
1 tomato
2 sticks celery
1/2 c flax seeds - soak in water for 10 mins
1/2 teaspoon pink salt or sea salt
1/8 teaspoon paprika

Method

1. blend all ingredients but keep back 2 T of the soaked flax seeds and add after the mixture is blended.  This makes the chips have another dimension  and texture with the bite of the flax seeds dotted around.
2. use a teaspoon to spoon little blobs onto a paraflex sheet, about 1/4 cm thick.  Don’t overfill the spoon, it makes for very unruly shapes.  Though, admittedly, mine came out in an assortment of sizes and more oval than round.  If you have a better way please share it.
3. dehydrate on 115 for 2-3 hours.  This is very random and seems to depend on the humidity in your house , if it is raining, if there is cloud cover or if there is an eclipse (exaggerating!), and how much water was in the mix.  And I thought using a dehydrator would be an exacting science!  When you can lift them off the sheet without squidging them to a brown mess, gently lift them off the paraflex sheet and put them straight onto the mesh for approx 4 hours or until as crispy as a potato chip.

Serve in a bowl.  Pile the crackers into the bowl and nestle in a ramekin, spilling over with the gooey, onions.  You can also make a little h’ orderves stack with an oily, flavoursome sun-dried tomato and a spoon of the sweet onions between two crackers.  The crackers will keep for weeks in an airtight container but let’s face it that would only happen if you forgot you had them.  Great for snacking, and AMAZING used as little scoops for cheeszy vegan nacho dip.  I like to build a little scoop and then stand up, pop them in my mouth whilst twirling on the spot.  Try it.  I am sure it improves digestion or something.  Probably not best to do this in the office though, unless you get everyone to join in.  The Twirling H ‘ordervishes!

Filed Under: Appetiser, Snacks Tagged With: appetisers, gluten free, HOME, RAW, secret recipe club, starters, Vegan

Swedish Cake Toscakaka - Secret Recipe Club

March 19, 2012 by India Leigh

Swedish Cake Toscakaka – Secret Recipe Club

Whilst I may be missing San Francisco and yearning for a place where my heart calls home, there are things about the UK I love. Friends. The ability to purchase good poppadoms. Radio 4. And my kitchen. When I turned the key in the lock and hauled my body, weary from 18 hours of returning Eastward, up the front doorstep…stepped into my kitchen I was flooded with nostalgia for my very own space. The pots, my red dutch oven, my chef knife, the little timer in the shape of a lemon that I never use and the soup spoon that is too large for my mouth. It was good to be ‘home’.
I’ve not cooked for a couple of months, well I have cooked but not created or veganised any recipes, or baked a single cake or airily light sweet muffin. I’d been AWOL from the The Secret Recipe Club too. When I put the red apron over my head and set to work on my return recipe, I tied that bow around my waist with a satisfied tug. Oh, how I love to cook.

The Secret Recipe Club assigns you to a biog from the list of members, for you to secretly choose one of their recipes to make. All the while, someone else has also been secretly poking around in your blogosphere recipes ,to cook or bake one of yours. It is huge fun and I love the discipline needed get it cooked and written about on time, AND the chance to try recipes from blogs I may not have otherwise come across.

This month I was signed to the pretty pink blogging home of Avanika, a baker from Mumbai. She writes in such a fun way. You almost feel like she is right alongside you in a kitchen full of adorable smells of baking. I loved the fact that I am baking alongside a cook from India! I went through the history of Avanika’s baking, and picked out three possibles for me to veganize. Creamy Lemon Slices, Crunchy chocolate bars but, owing to jet lag and a mountain of menus to plan and notes from my trip to assimilate I opted for the easiest option - Swedish Visiting Cake or Tosca Kaka to give it its Swedish name.

Avanika’s recipe was very simple to follow and it took no time to make (and eat!).

Veganising the recipe altered up her recipe just a bit. I would suggest doubling her recipe also as it made for a very small cake. The quantity below will give you small a 7inch cake.

This is my version. I cut out some of the sugar and butter, turned it gluten free and made it vegan. Healthier AND ‘yumsilicious’.

Ingredients

Heat oven to 180
lightly grease a 7 inch pan with vegan butter

1/2 cup coconut palm sugar
zest of 1 lemon
5 Tbs of apple sauce
1/2 cup almond flour
1/2 cup sorghum flour
1/4 cup vegan butter
1/4 cup almond flakes or slithers
1 tsp vanilla extract or the seeds of one pod
1/2 tsp almond extract
1/4 tsp pink salt
4 drops lemon oil (optional)
1 tsp baking powder

Method
1. cream together vegan butter, sugar & zest, add extracts and salt and lemon oil (if using).

Fold in the flour and baking powder (sift the sorghum and baking powder together to ensure even distribution). Beat lightly for a moment and spoon into the greased cake pan.
2. bake until your kitchen is filled with the sweet smell of cake. Approx 30mins. Check if done if a tooth pick comes out clean.
3. leave to cool, put on a wire rack.

I LOVED this cake. It was moist, the palm sugar gave it depth and a chewy, caramely, crust. The subtle hint of fresh lemons gave the cake lightness and harmonised effortlessly with the almonds. I declare it a ‘keeper’.

Thanks Avanika (smiles)

Filed Under: Desserts & Sweets Tagged With: gluten free, HOME, Recipes, secret recipe club, vegan baking

Baked Zucchini Fries with lemon aioli - Gluten free, low fat and crispilicious

December 5, 2011 by India Leigh

Baked Zucchini Fries with lemon aioli – Gluten free, low fat and crispilicious


Hello!  This week I’ve been rushing around, on my bike, on the train, around food festivals, in food markets, around my kitchen experimenting with some delights I will share here soon.  Busy, busy! I have also been racking up some time at  The Lean Green Bean   Its my fifth month with the The Secret Recipe Club and Lindsay’s foodie foray was to be my December assignment. Read about it here to find out what it’s all about (if you can keep a secret).   

Lets talk fries….


Crispy garlic Zucchini Fries

These looked so good on Lindsay’s blog I just had to give them a go.  There was a teeny bit of tweaking to be done to make these crispy sticks gluten-free and vegan.  Traditional recipes of this type use egg to bind the crumb to the object- de-la-legumes so I needed to find the best alternative.  I didn’t want to use something out of a box that someone else had produced I wanted to find a vegan ‘egg’ in my cupboards.  This website was a big help - all about egg replacements in baking.  I used 1 tbs flour (sorghum), 1/2 tsp oil and 2 tbs water to mix to a paste.  It worked a treat.  Here is what you need for the rest of the recipe

  Ingredients
(serves 2)
2 zucchini (courgettes) julienned
2 tbs gluten-free flour (sorghum has a lovely flavour and works perfectly)
1 tbs vegan Parmesan powder or nutritional yeast
1/4 tbs gluten-free bread crumbs
1/4 tsp garlic powder
1 tsp baking powder
1 tsp paprika (you can also add a pinch of chili powder if you want them fiery)
salt & pepper to taste


method


1.Prepare your station
bowl one - flour & Parmesan
bowl two - egg replacer - (flour, oil and water)
bowl three - breadcrumbs, paprika, garlic powder, baking powder, salt & pepper
2. dip the bald fries into the bowls from 1-3 ensuring they are well covered. 3. gently place on an oiled baking sheet and bake in a pre-heated oven at 220 degrees for 20 mins.  Give them a little shake halfway through. 4. serve immediately with lemon aioli (blend tofu, lemon juice and garlic powder or minced garlic clove and season to taste)


Did I enjoy them? A picture speaks a thousand words!   

I think I actually like them better than sweet potato fries (speaks my fickle heart) as the texture and flavour are very close to white potato fries…only better AND good for you.  The spud being a member of the nightshade family is a no-go area for many.  This recipe will be sweet music to their ears.

See, this is what happens when you are a member of The Secret Recipe Club, you stumble across edible gems you might otherwise have missed. Bravo Lindsay. I hope your December SRC was as happy-making as mine.

Filed Under: Appetiser, Sides Tagged With: gluten free, HOME, low fat, Recipes, secret recipe club, starters, VEGAN STARTERS

Caponata Polenta Stack

November 7, 2011 by India Leigh

Caponata Polenta Stack


Theresa.  She’s a food hunter.  She knows what she wants and nothing will stop this girl from finding it. She grabbed her utensils, trudged doggedly through, erm (counting)..1..2..3..well, ALOT of many States, from East to West in her quest to feed the hungry that arrive famished at her door…well,..website.  The Food Hunter’s Guide to Cuisine  This where she shares her knowledge of everything (well…almost) food.   She’s passionate about good local ingredients and loves to cook.  This month she was picked from the bunch to be my secret source of sustenance for (drum roll) this months Secret Recipe Club. 

If you don’t already know, SRC is a monthly club for international foodies.  It fun, fantabulous and free to take part.  It’s like a random recipe generator.  Nudging you out of your comfort zone and midweek meal melay.   I dug and delved and discovered… Caponata.  A Sicilian dish overflowing with garden vegetables.  Caponata Melanzane (eggplant) (aubergine)..


I set out from the start to simplify the way it was made, and then I complicated it (just a little bit) and I think it was worth it.  I decided to stack it. Stack it real good. 

Caponata Melanzane with Garlic Polenta Stack

Serves 2-3   If you are going to create the stack and make the polenta sheets then scroll down and prep the polenta first.  You can then carry out the other steps whilst it bakes.


Gather

1 large aubergine/eggplant (about 4 cups) - 2cm dice
4 celery stalks (1 1/2 cup) sliced 2 cm on a diagonal
1 medium onion, sliced thinly
1/2 cup olives (chop half of them in half and keep rest whole)
1/4 cup capers
2 skinned tomatoes
2 tbs red wine vinegar
1 tsp xylitol, fruit sugar if like me, you prefer sugar free, if not a concern then use sugar…actually, you could probably do without any ‘sweetning’ altogether
1/2 tsp harissa paste (optional..I LOVED the subtle kick)
1 tbs fresh chopped parsley
7 large basil leaves, torn

*some Sicilian recipes add sliced almonds and a shake of cinnamon.  Perhaps I will next time.


‘This is how we do it’…

1.grab two pans
2. in one pan, saute in 1 tbs olive oil, the sliced onions with the harissa if you are using (put the lid on top as this helps them to soften and caramelise, rather than burn) will take about 7-10mins
3. grab pan number two and in 1 tbs oil, fry the diced aubergine.  Theresa’s recipe suggested the whole ‘sprinkle with salt and leave’ shenanigans for the aubergine, but I have not found it necessary and if I can make life easier I will.  Fry until turning golden.
4.remove the onions from their pan and set aside.  Saute the celery, adding a little more oil if necessary, until edges start to brown.
5.add the skinned chopped tomatoes and vinegar and simmer for 5 mins
6.add the remaining ingredients (retain a few basil leaves for garnish) and simmer for a further 5 minutes.
7.use the polenta sheets to create the stack, tear the basil leaves and mix into the caponata then spoon it between the garlicky polenta. Serve.

For the Polenta sheets
1 cup polenta
1 1/2 cup water
1/2 tsp garlic powder
1/2 tsp salt
1/4 tsp pepper

preheat oven to 220/400.  Prepare an oiled baking tray 10inch by 5 inch

1. slowly pour the polenta into boiling water whilst stirring and add the seasonings and continue to stir until it boils.  Reduce heat to a simmer, continue to stir until it thickens.
2.bake for 20 mins.  Remove from the oven and score with a knife into 6 equal squares.  Pop back into oven for further 10 mins.


I really enjoyed this dish, thank you Food Hunter.
If you are interested in joining The Secret Recipe club then click on the link at the start of this post.  Come join, it’s so FANTASTICO!

Filed Under: Appetiser, Entree/Mains Tagged With: AUBERGINE, caponata, eggplant, gluten free, HOME, Recipes, secret recipe club, the food hunter's guide, Vegan

  • 1
  • 2
  • Next Page »

About Me

Hi, my name is India. Welcome to A Vegan Obsession. This site is for you to enjoy the delicious discoveries of a gluten free, vegan traveller and cook. Read More…

  • Email
  • Facebook
  • Google+
  • Pinterest
  • Twitter

Search

Subscribe

Buy The Cooking App

V Is For Vegetable

Popular Posts

Vegan Cookbook Review and Giveaway
Lemon, cardamon cookies encrusted with dark chocolate and pistachio crumbs.
[Friday GIVEAWAY for Dog Lovers] Healthy Chew Bones For Your Darling Dog
Artisan Raw Chocolate Giveaway from Fine & Raw
A WEEK OF GIVEAWAYS!!  UK National Vegetarian Week.  Today A HUGE Box Of Hand Cooked Crisps from Ten Acre

Health

Crispy Kale & Pine Nut Pizza – Cauliflower Crust.

Crispy Kale & Pine Nut Pizza - Cauliflower Crust.

Healthy Vegan Santa Cruz

Healthy Vegan Santa Cruz

New Grains Gluten Free Vegan Bread – Review & Giveaway

New Grains Gluten Free Vegan Bread - Review & Giveaway

Healthy Vegan Fast Food In San Francisco

Healthy Vegan Fast Food In San Francisco

Connect

Discoveries of a gluten free, sugar free, vegan foodie. Read More…

Vegan Cookbook Review and Giveaway
Lemon, cardamon cookies encrusted with dark chocolate and pistachio crumbs.
[Friday GIVEAWAY for Dog Lovers] Healthy Chew Bones For Your Darling Dog
Artisan Raw Chocolate Giveaway from Fine & Raw
A WEEK OF GIVEAWAYS!!  UK National Vegetarian Week.  Today A HUGE Box Of Hand Cooked Crisps from Ten Acre
Baked Zucchini Fries with lemon aioli – Gluten free, low fat and crispilicious

Copyright © 2019 · Foodie Theme by Shay Bocks · Built on the Genesis Framework · Powered by WordPress