A Vegan Obsession

  • Home
  • Recipes
  • Travel
  • Product Reviews
  • Giveaways
  • News & Interviews
  • About
  • Contact

Super Snack - want a snack that disguises itself as indulgent but is actually healthy?

October 11, 2012 by India Leigh 5 Comments

Super Snack – want a snack that disguises itself as indulgent but is actually healthy?


I found this great snack on the internet the other day.  It is sweet, good for you and, if you keep a tray in the freezer, you are only ever  minutes away from a sweet, guiltless ‘chocolatey’ boost.

It’s 5 ingredients to fruity heaven.


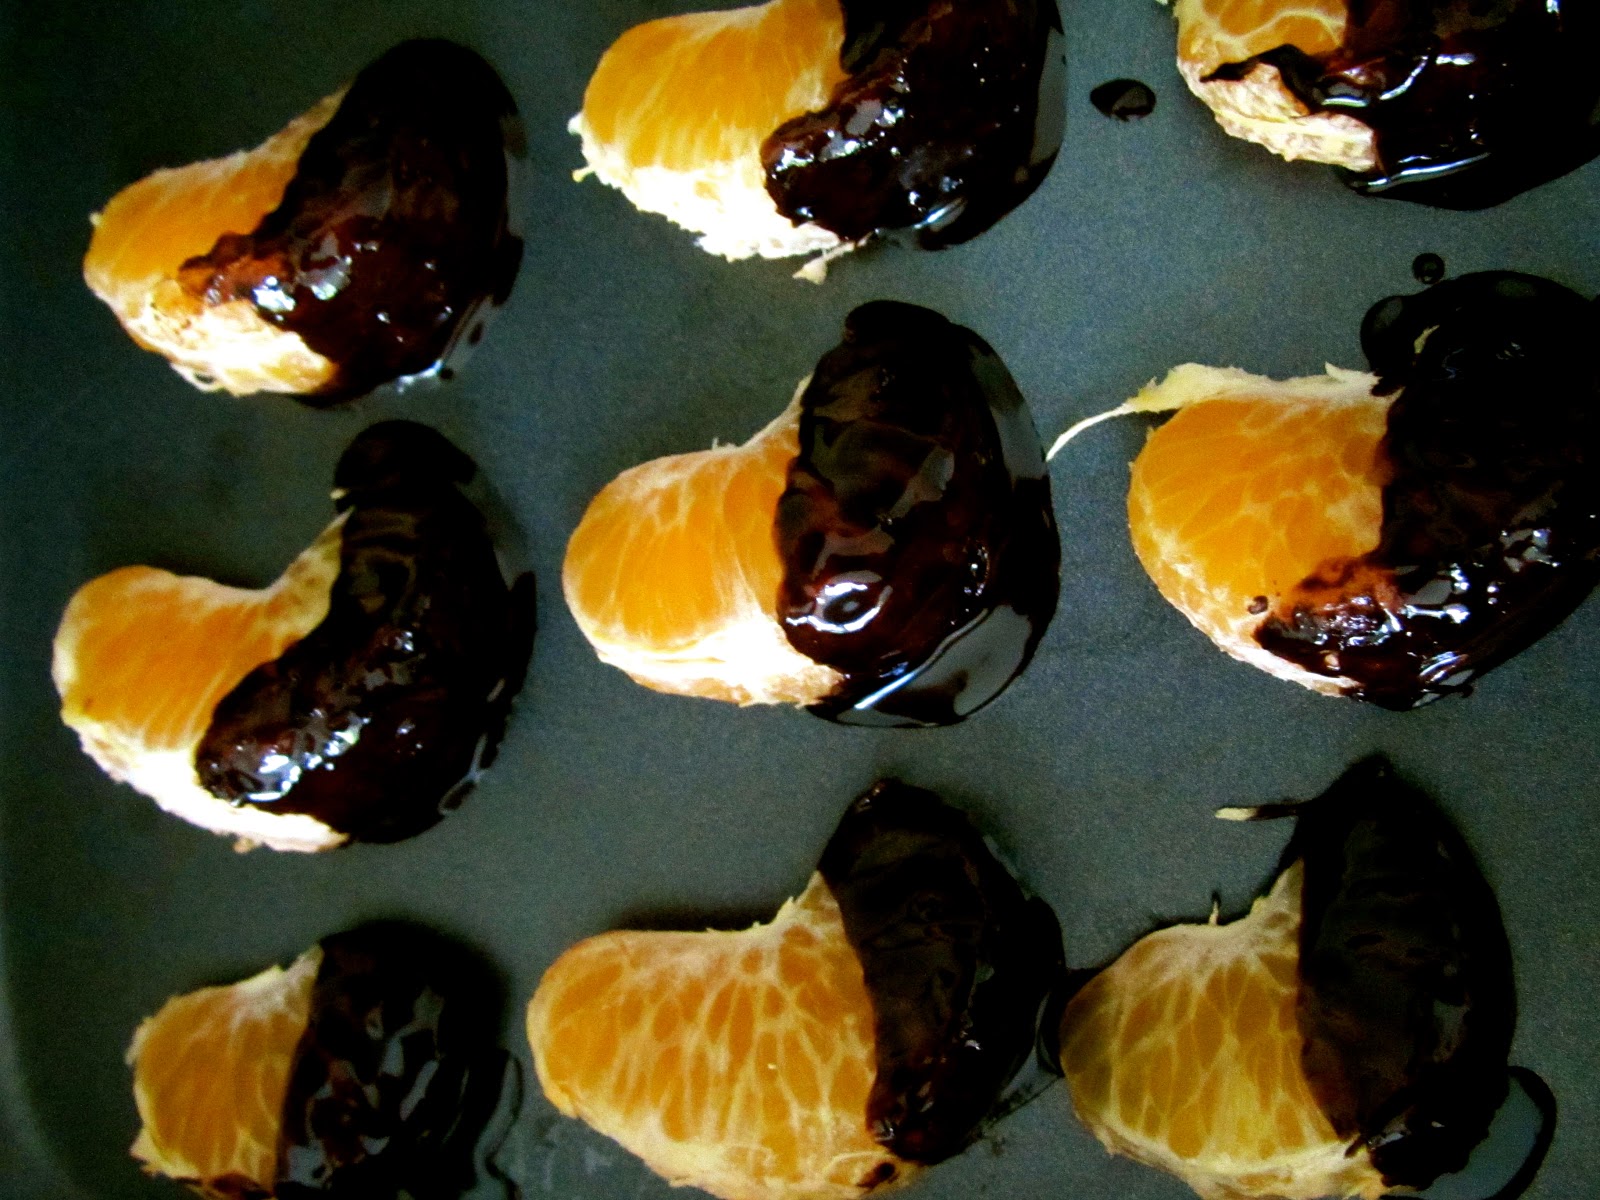
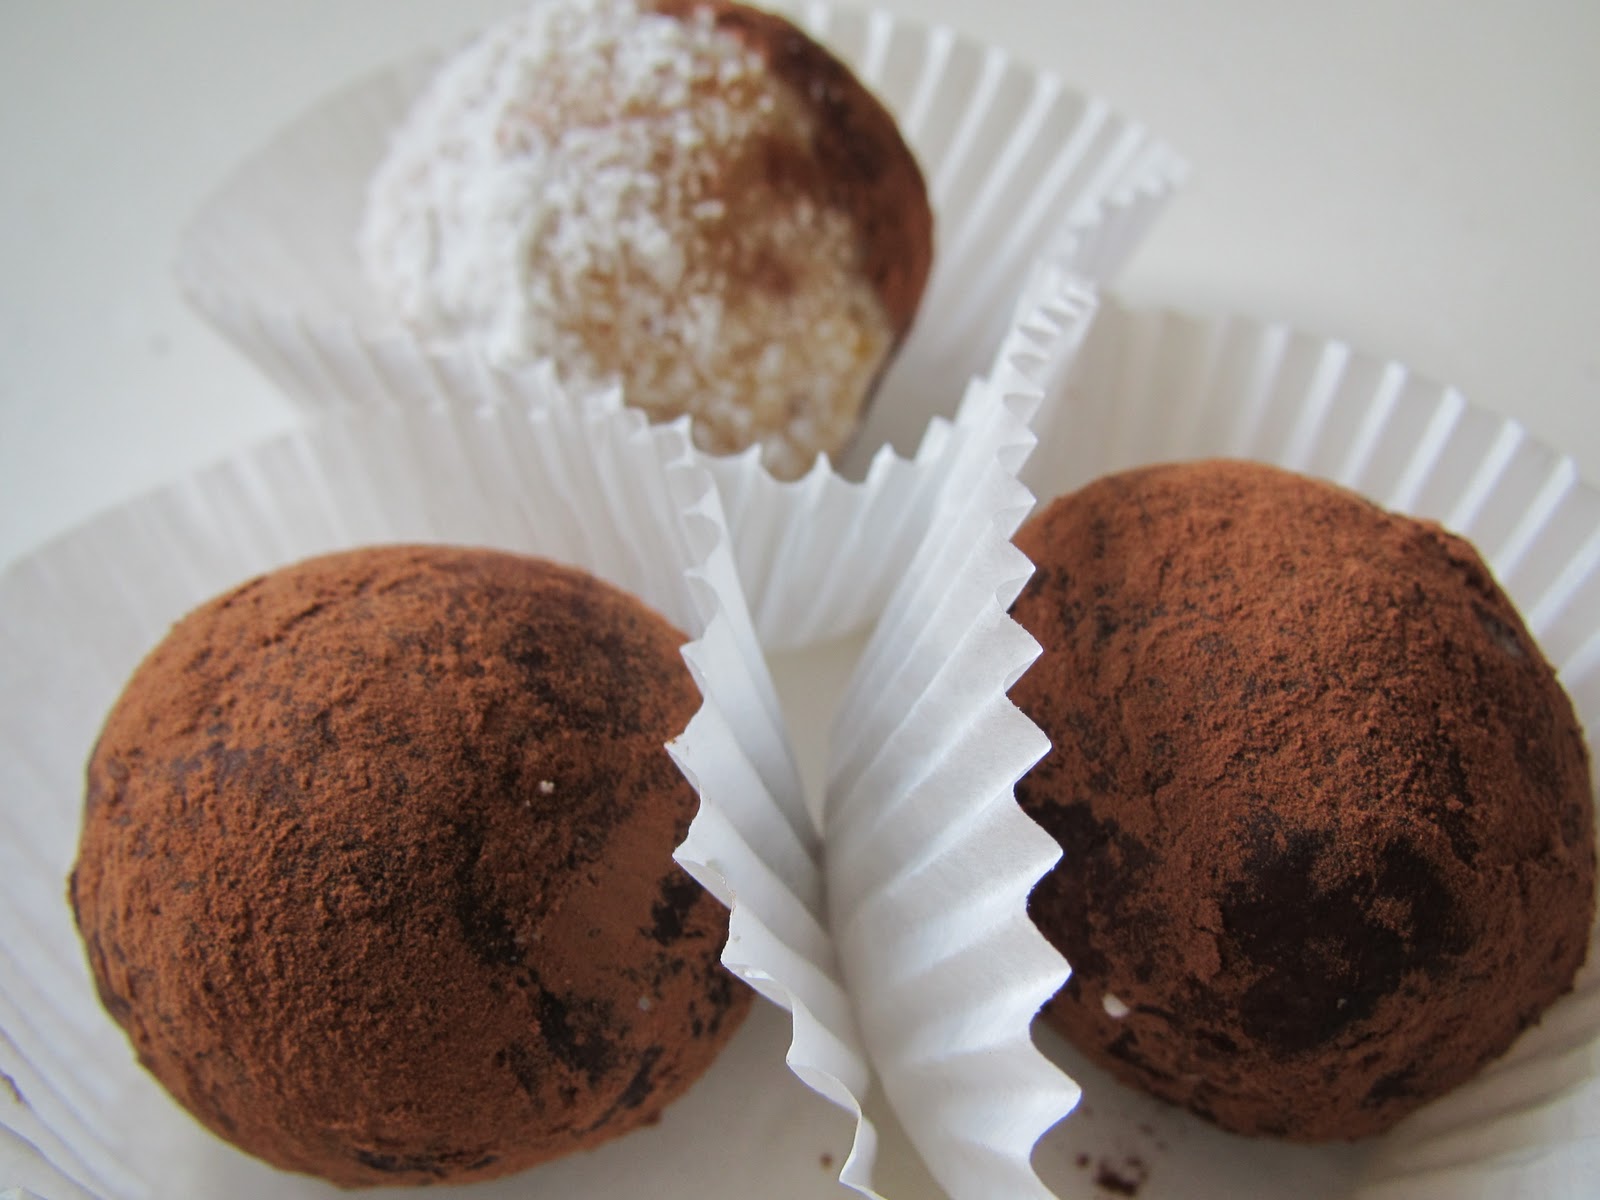
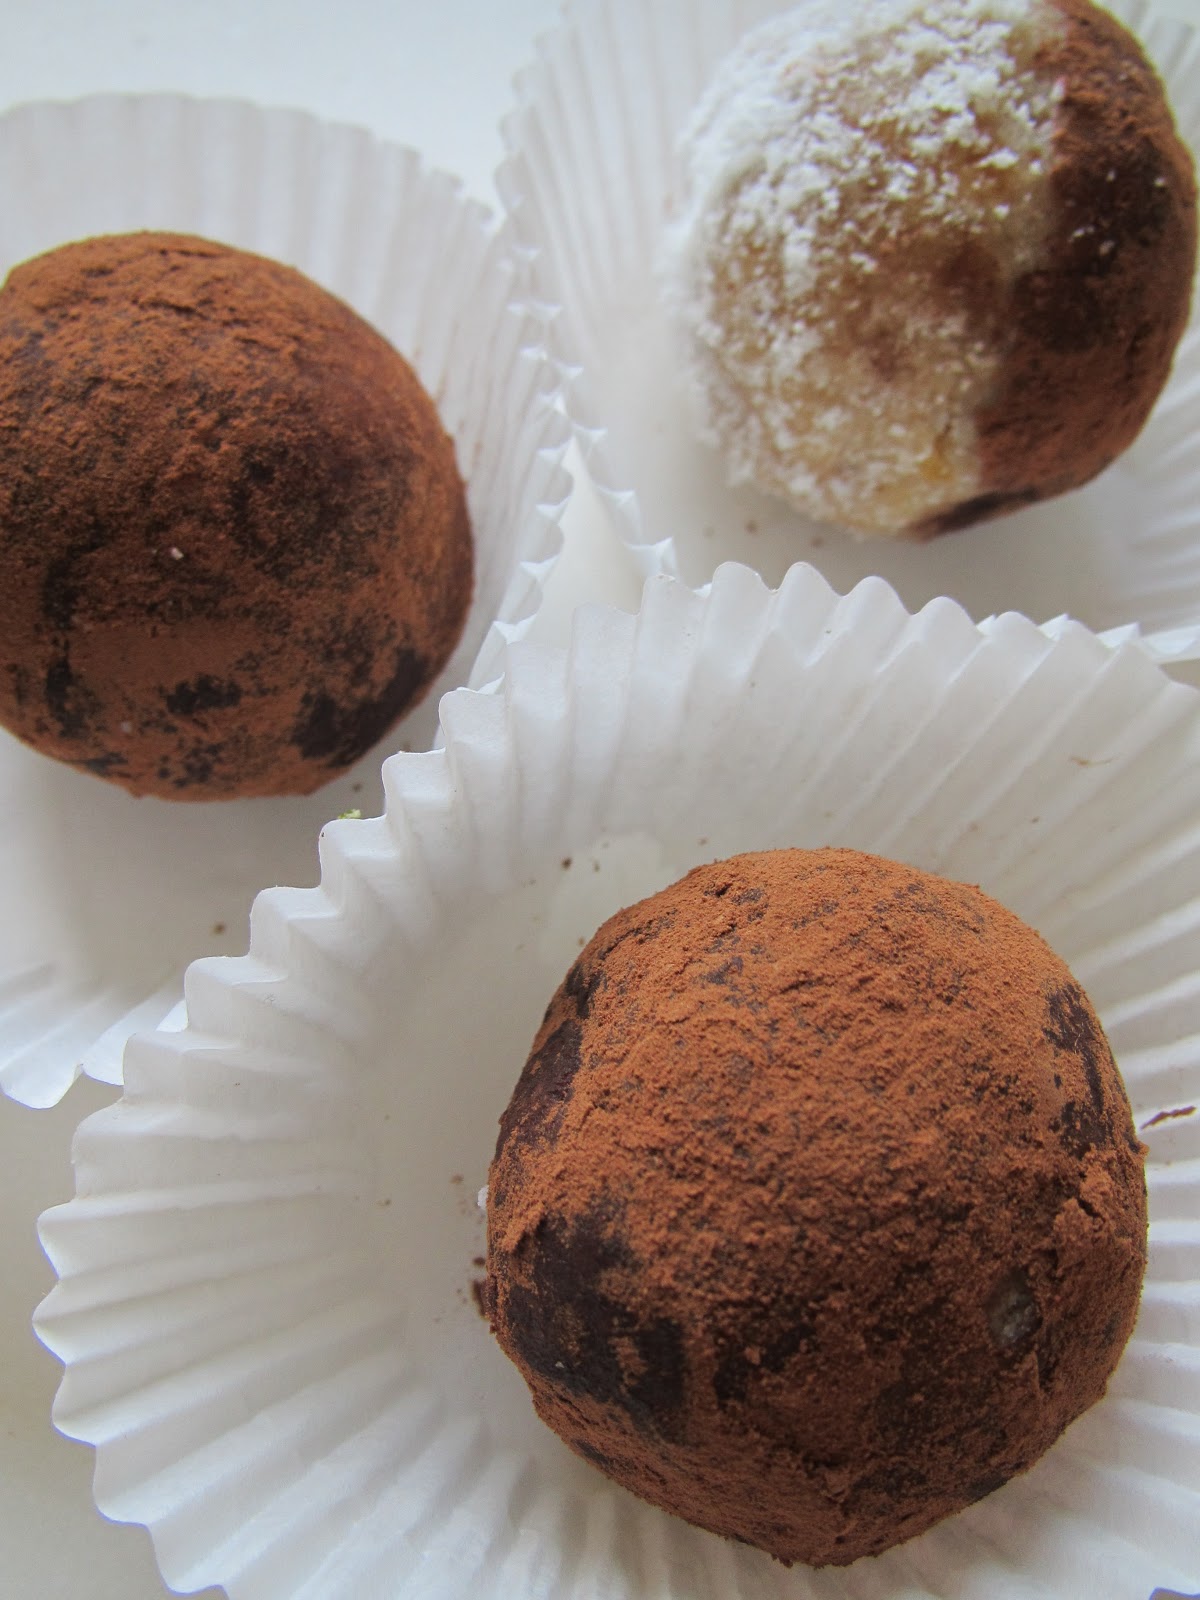
Pick a fruit of your choice - pictured above - Half moons of citrusy Clementines.  If you chill it in advance the chocolate/carob will set much quicker and make it easier to make an aesthetic dip (as I learnt after I made it!).  They are real fun to make.

I chose to use carob instead of chocolate, because a)that is what I had nestled in my cupboard b)chocolate contains caffeine and I’m off that right now.  Carob is also naturally sweet so I had no need to add extra sweetener.

2 Tbs carob flour
1 Tbs coconut oil
pinch salt
(optional) 4 drops orange or lemon oil


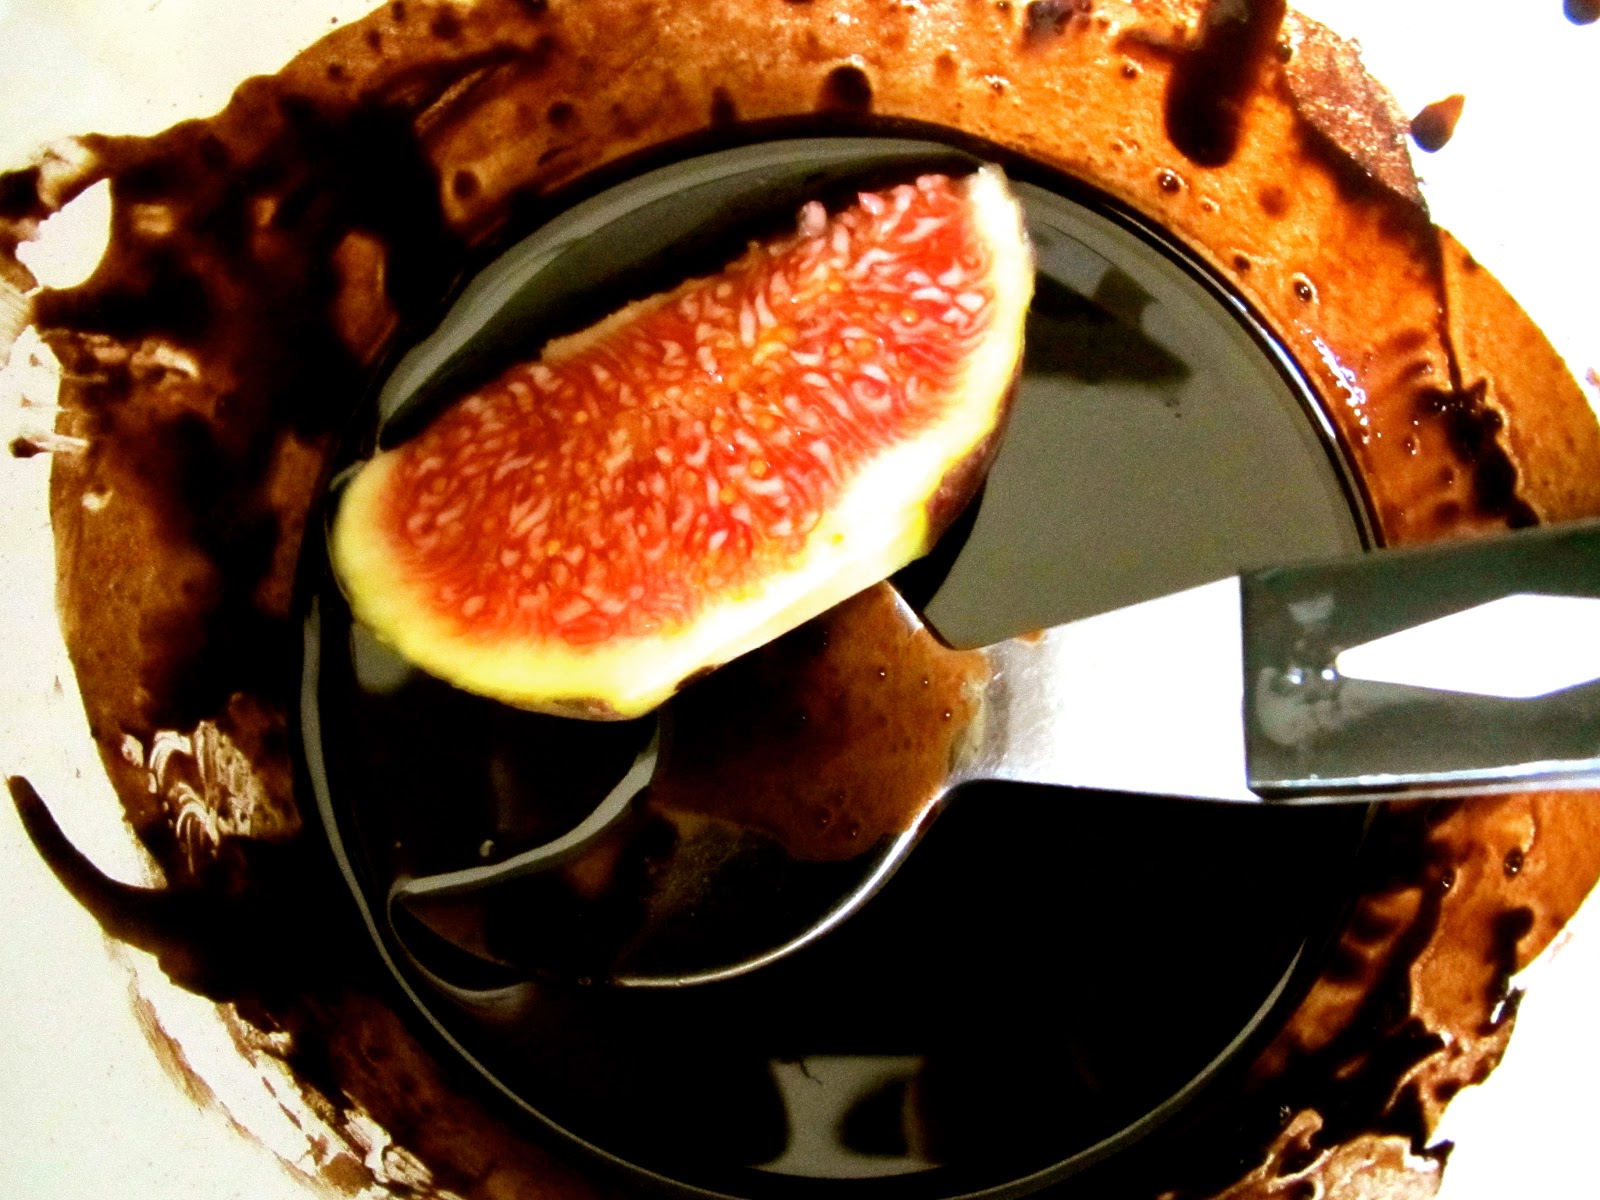
Gently melt the coconut oil.  Thoroughly stir in the flour, salt and citrus oil, if using.  Dip each orange jewel into the carob, covering one half.  Put on parchment sheet and pop into the fridge or freezer to set.  It takes just a few minutes.

10 segments = Only 21 calories per segment!

The thin, crisp layer of smooth carob melts to the cool, sweet, juicy, zesty clementine.  It really is that simple.

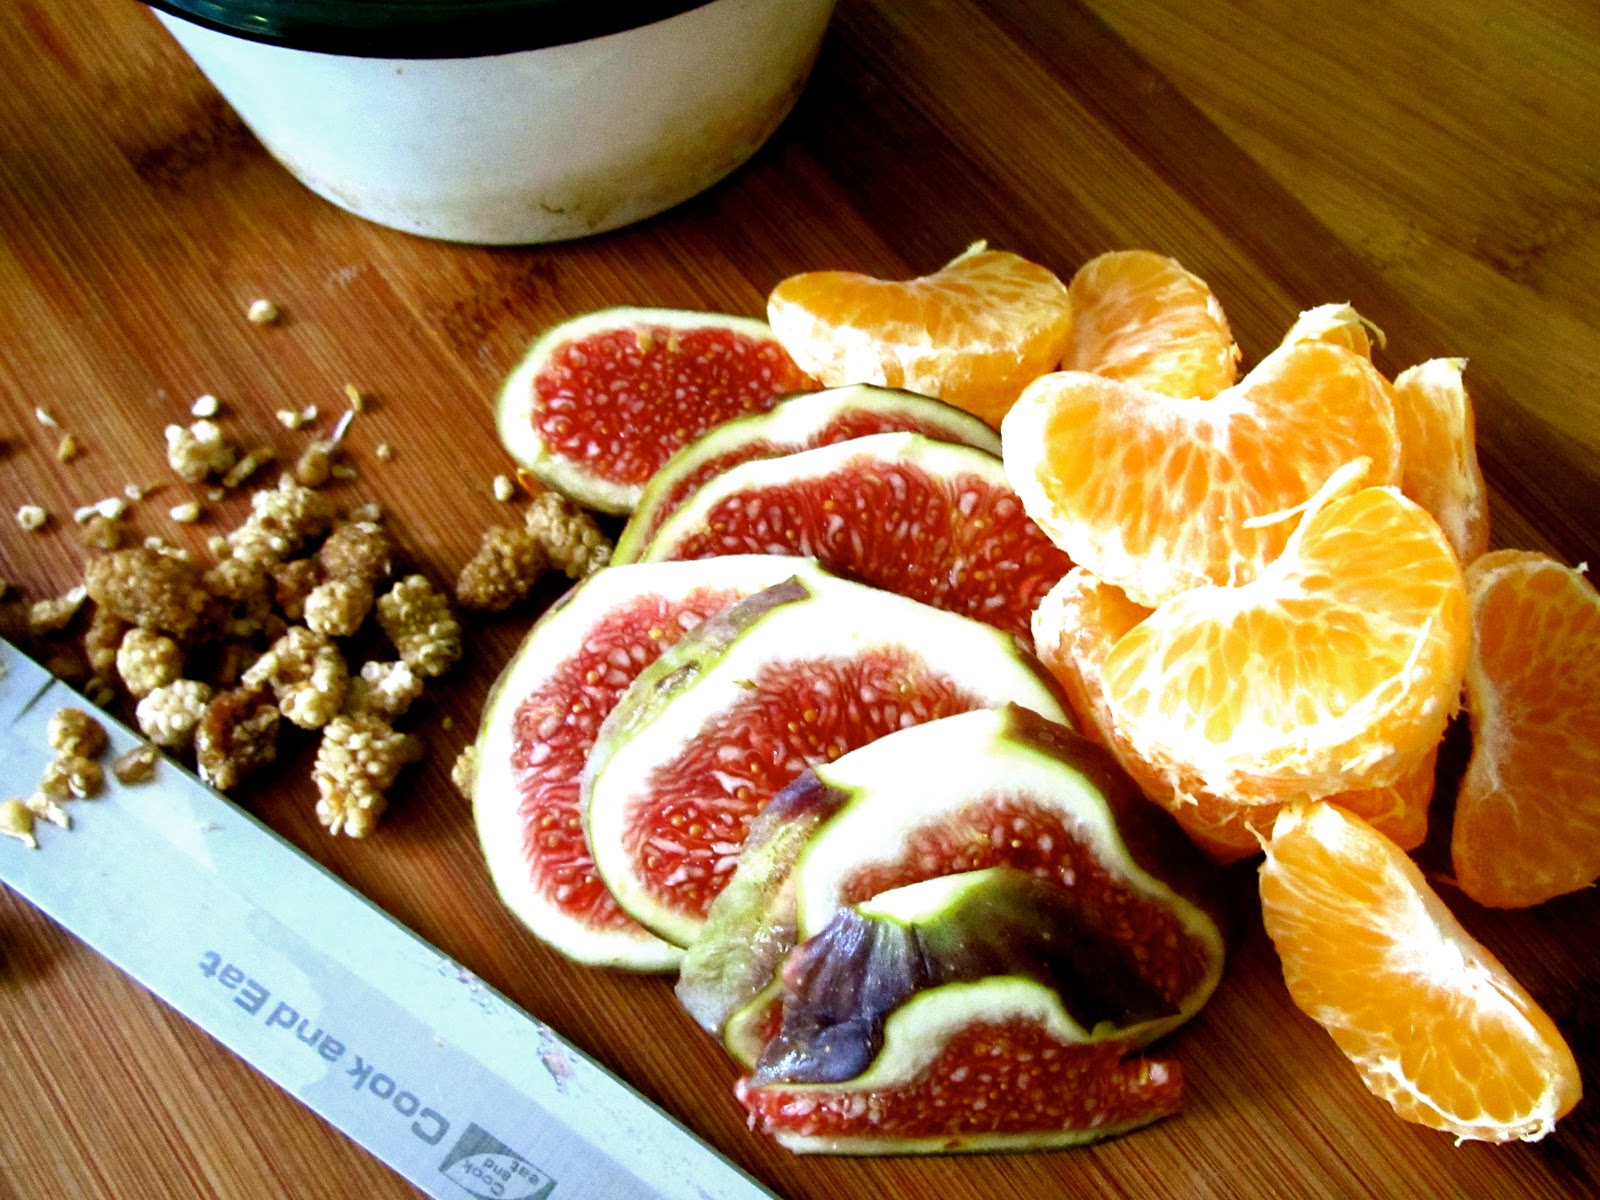
I also dipped slices of succulent, fresh fig, and small nibs of dried sweet mulberries.   Both are low GI.  Add a little pinch of chili powder for a brazen little kick.

A great idea for a post work-out snack or healthy alternative to sugary sweets for your wee ones.


Be well

India Leigh xx

p.s  When I rediscover where I found this fruity recipe, I’ll come back and give her due credit.

Filed Under: Snacks Tagged With: fruit, HOME, low calorie, low fat, Recipes, sugar free, treats, vegan snacks

Cheezy Cauliflower Popcorn - so good it’s criminal!

May 21, 2012 by India Leigh 12 Comments

Cheezy Cauliflower Popcorn – so good it’s criminal!

My target for this month’s The Secret Recipe Club, where members get secretly assigned a cooking blog to recipe test was,  Ma, What’s for dinner?   

Mother to 3 boys, Alex, has transformed her unruly and oft hair pulling, meal times by cooking WITH her children.  Her reason?  Get your children interested in food and they will build up a healthy, long-standing relationship with food.  The result? She’s bonded with her kids in the kitchen, and is inspiring others to do the same.   Isn’t that fantastic?!  Cooking is a priceless life skill, eating well is best imported into the minds of little people from day dot.  It is clear, Alex’s family obviously treasure time spent together in the kitchen. 

When Angie, one of the ladies that make the magic happen at SRC, and also queen of her own blog Big Bears Wife, sent me this month’s secret assignment, I admit to being momentarily stumped.  Alex and I are chalk and cheese when it comes to food choices. Alex’s recipes tend to be heavily meat based. I am a vegan.  I had to pick a recipe to trial and blog about, but I’m all about health and taste without animal products…What to do when faced with a challenge?…..become SOULUTION targeted.   I clicked in and out of several recipes and landed upon Popcorn Balls.   The ingredients list nearly had me running for the hills - butter, sugar, corn syrup!!!   I hatched a plan to discover a way to make these grab and run, treats tasty, quick and GOOD for you. 

 I adore researching recipes online.  Food bloggers are so creative!  This can be especially true for vegan bloggers who think outside of the box.  My poking and clicking unearthed a recipe I thought could use whilst (loosely) keeping to the theme.  No, it is has no sugar, it is not even made out of corn BUT it is good.  Very good.  SO GOOD these badboys are now nipping at the heals of my TOP vegan snack of choice - the KALE chip!

I give you - Cheezy Cauliflower Popcorn!   Yes…believe it. 

Raw Food guru Philip McCluskey was the man who created this recipe and set of bloggers in their thousands to get them some movie snacks.
I kept them raw, but you can do raw-raw and baked too.  They are such fun to make and are VERY moreish!  Allow 1/2 head of cauliflower per person.

I borrowed my friend’s 8 year old to make these with me and their verdict was….’they’re epic!’ (seems to be the new buzz word…better than ‘sick’ I guess)


Serves 2

Ingredients
1 head of cauliflower
4 tbs nutritional yeast
1 tbs olive oil
1/2 tsp salt (or to taste)
Method
1. chop the cauliflower into small bitesize pieces (please do as I say and not as I did and made them too big….I thought I knew better.  Lesson learnt!) and place into a zip lock bag or a plastic tub with a lid or deep sides.
2. add the oil and water to the bag and give it a good shake
3. next put in the seasoning and shake, shake, shake until the florets are  covered and golden.

next - there are 3 ways to do this….

raw-raw - that’s it, you are finished and can snack at will
raw-put onto a paraflex sheet and dehydrate for 5-7 hours
baked - add an additional tbs of oil and pop into the oven for 20 mins.


Ingredient swaps - swap the nutritional yeast for ground nuts.  swap the nutritional yeast for date syrup or maple syrup and ground nuts (grind your own in coffee grinder or high speed blender) so a sweet snack.   Don’t swap, but add - flax meal when dehydrating - so nice, as the flax meal goes all crisp and nutty!

Filed Under: Snacks Tagged With: allergy free cooking, gluten free, good carbs, HOME, low fat, raw food, Recipes, secret recipe club, Vegan

Spying on Janes Adventures in Dinner - RAW appetiser

April 23, 2012 by India Leigh 15 Comments

Spying on Janes Adventures in Dinner – RAW appetiser

Poking around in websites, hunting for clues to the identity and make up of a blogger is one of my pass times.  People watching, but indoors, without a glass or cup of something in hand, and actually without any ‘real’ people.  Well, of course they are real but a high percentage don’t have a profile picture…just proud pictures of supper, donuts with pink frosting, or a close up of a blender, mid-blend. So I try and build stories about people via their recipe listings or their ‘blog roll’ (does only a British person get the irony in that title?).  Mostly, the ‘about me’ tab gives a line or two about the food they like, who they eat it with or make it for, and a bit of back story - pet dog, food persuasion, geographical location.  I’ve been spying on Janes Adventures In Dinner  she’s Canadian, a mom.  She’s about food, she’s about photography, she’s about creative crafting, she’s about ‘giving it a go’ and making life a party. It was my mission to steal (borrow) from her. I had to make sure she didn’t suspect a thing.

The brainchild of this assignment is Amanda Formaro.   Amanda from Amandas’ Cookin set up The Secret Recipe Club so she could have some fun and connect with fellow bloggers, and it was 1 year old this month.  The number of members have shot up.  I love the randomness of of it all.  Each month you get assigned (secretly) a food blogger to be your target.  It’s very random.  Last month I made a Swedish Cake.  It is ALWAYS an inspiration.  It is usually a challenge….being a vegan n’all!  But a welcome one.  I spied some great looking onion and feta pizza on Jane’s blog.  She was waxing lyrical about it.  Here is what I did with it. It’s vegan and, as I’ve just taken delivery of a humming (huge) dehydrator…RAW.

Raw Caramelised Onion on Tomato Flax Bread - totally gluten free!

Ingredients

1 large (tennis ball size or a teensy bit bigger) white onion
4 dates (soft ‘Jasmine’ are perfect, if not soak them for 10 mins in a little hot water)
5 tablespoons Tamari (or coconut amino’s or Braggs liquid amino’s if you are soy free)

Method
1. slice onion into rings (about 1/4 cm thick). Pop into a mixing bowl
2. put the dates (drain them if soaked) in a blender with the amino’s and blend to a paste
3. spoon the paste into the bowl and use your hands to mix the paste into the onion rings so they are all gooey and sticky and covered well.  It smells good already at this point!
4. spoon onto a paraflex sheet or baking paper and put into the dehydrator for about 6 hours, until soft.

You will not believe how good these taste. So many uses for them. A big spoon of the sweet and sticky ribbons of onion on top of some mash would be spoonable nirvana (not the band).

Flax crackers

Ingredients
1 tomato
2 sticks celery
1/2 c flax seeds - soak in water for 10 mins
1/2 teaspoon pink salt or sea salt
1/8 teaspoon paprika

Method

1. blend all ingredients but keep back 2 T of the soaked flax seeds and add after the mixture is blended.  This makes the chips have another dimension  and texture with the bite of the flax seeds dotted around.
2. use a teaspoon to spoon little blobs onto a paraflex sheet, about 1/4 cm thick.  Don’t overfill the spoon, it makes for very unruly shapes.  Though, admittedly, mine came out in an assortment of sizes and more oval than round.  If you have a better way please share it.
3. dehydrate on 115 for 2-3 hours.  This is very random and seems to depend on the humidity in your house , if it is raining, if there is cloud cover or if there is an eclipse (exaggerating!), and how much water was in the mix.  And I thought using a dehydrator would be an exacting science!  When you can lift them off the sheet without squidging them to a brown mess, gently lift them off the paraflex sheet and put them straight onto the mesh for approx 4 hours or until as crispy as a potato chip.

Serve in a bowl.  Pile the crackers into the bowl and nestle in a ramekin, spilling over with the gooey, onions.  You can also make a little h’ orderves stack with an oily, flavoursome sun-dried tomato and a spoon of the sweet onions between two crackers.  The crackers will keep for weeks in an airtight container but let’s face it that would only happen if you forgot you had them.  Great for snacking, and AMAZING used as little scoops for cheeszy vegan nacho dip.  I like to build a little scoop and then stand up, pop them in my mouth whilst twirling on the spot.  Try it.  I am sure it improves digestion or something.  Probably not best to do this in the office though, unless you get everyone to join in.  The Twirling H ‘ordervishes!

Filed Under: Appetiser, Snacks Tagged With: appetisers, gluten free, HOME, RAW, secret recipe club, starters, Vegan

How to make Cheddar(ish) Hard Cheese - Dairy-free, Gluten-free, soy-free - Easy

December 12, 2011 by India Leigh 17 Comments

How to make Cheddar(ish) Hard Cheese – Dairy-free, Gluten-free, soy-free – Easy

What is it about cheese?…The firm, definite push of the knife as it makes its bid to reach liberty on the counter top, and a thick hunk breaks free, topples forward onto the board; the cool hard bite between wholesome spongy bread; the tang amid fiery french mustard and the melting, saltiness of butter?  For eleven years this experience had passed me by.  For the most part, to be honest, not even missed.  The dairy version, to me was a romantic notion. In reality, the pre-vegan experience, left me with an unpleasant aftertaste with the aromatics of silage. It didn’t fair in my body much better and left my body via spots on my face or sticky morning eyes (unpleasant I know).  I didn’t miss the effect dairy had on my body for an instant.  But, since my kitchen turned more to a food laboratory than a kitchen, and spending so much time reading food blogs and recipe books, I again became curious about cheese.  What was it that I did enjoy about a cheese sandwich on white bread with lots of butter?  And why did this foodstuff get cited over and over again as the one ingredient that stopped people from embracing dairy free food? And for those who are  already vegan, the more I’m getting to know you I realised perhaps cheese was one of the things you missed the most. My blog is all about making sure you don’t miss a thing. I just had to bring you cheese, not creamy or spoonable but HARD, FIRM, SLICEABLE CHEEZE.


So…to work.  What was it that I did enjoy about a cheese sandwich on white bread with lots of butter? I guess it was the opposing textures and lively, sapid, sharpness in combination.   Real Food Daily..right there in LA, has been serving up vegan cheeze for years. Vegan Angela had tried and tested it….. and now, it was my turn. Real Food Daily cheese recipe here - then follow my instructions in the post to make it A Vegan Obsession stylee,   I followed the recipe (mostly) and like Angela,  also halved the original recipe. First try came out more like a firm cheezy mousse.  Delicious but not the desired slab of dense cheeziness.  Second attempt is a rather respectable effort.  Firm but not quite up to the ‘two hand’ test of strength knife plunge akin to your average Cheddar.  However, I am a perfectionist but nearly perfect right now is a good interim, so I am happy with it none the less and feel it worth of sharing with you.   I shall continue to tweak and experiment and when I do discover the VEGAN HOLY GRAIL of cheeze ingredients to perfect this recipe, I’ll be back to lay it at your feet…..metaphorically speaking. 

I admit I made some modifications on the original recipe…..first time I used cashews but not enough agar; 2nd time I used the, less expensive, sunflower seed (that I pre-soaked in water for a couple of hours to make easy disgestible) over the cashews,  South River Miso supply a miso that is SOY FREE - made from the ubiquitos blonde chickpea as do Great Eastern Sun both USA companies. You could also use 2 tbs coconut aminos and I tbs coconut oil as a subsitute to make the cheeze soy-free. When I go to the store next I shall get some but I am all about getting a recipe perfected with the minimum of cost so I thought I’d give it a go.  Having a dairy-free, meat-free, gluten-free, sugar-free diet need not be expensive, and, hell, you save on all the medications you need to make you well from a standard Western diet, by default!  I also substituted (to keep it soy free) the soya milk with coconut milk (not cream) and added a couple of tbs of nutritional yeast.  I used a 1/4 cup of ground agar flakes. The flavour was awesome.  The texture like a firm pate or soyrizo.  Vegan Angela was not too ramped up with the flavour characteristics of hers so perhaps the concentrated flavours of dried miso soup added a little something.

½ cup raw cashews
1/4 cup nutritional yeast
1 teaspoons onion powder
1 teaspoons sea salt
1/2 teaspoon garlic powder
pinch ground white pepper
1 ½ cups coconut milk (in a carton and NOT coconut cream from a can)this is instead of soy milk
¼ cup ground agar agar flakes
¼ cup canola oil
2 tbs liquid aminos (Braggs or coconut) 1tbs coconut oil (this is to replace the miso if you require soy free..gently melt the oil and mix with the aminos)
1 tablespoons fresh lemon


Method - from The Real Food Daily Blog

1. finely grind the cashews in a food processor ((do not allow the cashews to turn into a paste). Add the nutritional yeast, onion powder, salt, garlic powder, and white pepper. Pulse 3 more times to blend in the spices.
2.Combine the coconut milk, agar, and oil in a heavy medium saucepan. Bring to a simmer over high heat. Decrease the heat to medium-low. Cover and simmer for 10 minutes, stirring occasionally, or until the agar is dissolved. With the food processor running, gradually pour the milk mixture through the feed tube and into the cashew mixture. Blend for 2 minutes, or until the mixture is very smooth and creamy. Blend in the miso and lemon juice.
For grated or sliced cheese: Transfer the cheese to a container; cover and refrigerate until it is very firm, about 4 hours. Once it is firm, grate or slice the cheese as desired.
For melted cheese: Use the cheese immediately as melted cheese. To make the cheese in advance, cover and refrigerate it. When ready to use, melt it in a saucepan over medium heat until it is smooth and creamy, stirring frequently and adding more soy milk to the melted cheese to thin, if necessary.

The cheese will keep for 4 days, covered and refrigerated.

I’d LOVE to know how yours turns out, and discover if you make any little tweaks to reach ‘Cheddar like’ perfection or inventive new fusion. 

I think next time I may try it with adding chopped walnuts to the puree and maybe, just because it’s seasonal, cranberries.  A little extra garlic may be nice to make a soft garlic cheeze too.  Oh the fun to be had.

* The cheese freezes well and can been used to enliven a soup (so good with brocolli soup) or melted into some vegan milk to make a sauce.


Filed Under: Snacks Tagged With: dairy free, gluten free, HOME, Recipes, soy free, vegan cheeze

How to make Simple Raw Two-bite Treats

November 11, 2011 by India Leigh Leave a Comment

How to make Simple Raw Two-bite Treats

To mark this day 11.11.11 when the world turns and becomes an even more exciting and happy place for everyone to be.  I thought I’d share with you a quickie recipe for you to make and fuel your brilliant day (I know it is going to be a brilliant day, a tiny bird told me, AND I went ahead and had a look for myself….(peeking) yep, pretty darn good!).

These raw energy balls are so simple to make.  I adapted the base from my no-bake Banoffee pie recipe (please note the coconut flour is the ‘powder’ found in Asian stores…you could just make your own by putting desiccated coconut in a coffee grinder) by using reducing the salt to a 1/4 tsp.  I halved the mix and added a 1/4 tsp chilli powder and then rolled into balls and dusted with cocoa powder.  The other half of the mix I added a tsp of coffee and rolled in half cocoa powder, half coconut powder. I have also made these with peanut butter and a slice of organic dried apricot in the centre.  If I had some strawberry powder I’d roll them in that…or, oooh, some freeze dried fruit, scrunched up and put in the mix, or a roasted salty almond in the centre.. thumbs up.  Ok, over to you.

 What would you add to make them your own?  We’d love to hear your ideas.

These are lovely, two-bite treats.  You could even make a big batch and store in the freezer so you always have some on hand.   Lovely idea for gifts.

Hey, if you have a day of brilliance you just HAVE to share.  We’d love to hear all about it. We are suckers for a good story. x

Filed Under: Desserts & Sweets, Snacks Tagged With: HOME, raw food, Recipes, vegan energy balls

Halloween - Spicy Pumpkin Cauldron Soup and Spooky Skeleton crackers.

October 24, 2011 by India Leigh 2 Comments

I found muse by the hundreds down in Brighton, UK last weekend at the Zombie Festival.  What a hoot…read about it here.  They inspired me to get home and do some baking.  I absolutely LOVED making these savory Halloween BITES!  I agree though, my cashew cheese piping skills have room for improvement.
The SOUP is SPICY BUTTERNUT SQUASH.  You can get the recipe through this wormhole (you can of course use pumpkin instead of the butternut squash.  If you want to do some piping and draw cobwebs (YES, that IS a cobweb on the soup!) then enter this darkened room and find the secret recipe here .
The mini gingerless, unbread, gluten free, savoury SKELETON biscuits were another wee invention of mine.
Makes about 40 mini skeletons
1 cup sorghum flour
1/2 cup coconut flour
1/4 cup potato flour
*if gluten free is not a concern use 1 3/4 cup plain flour
3 tbs cold vegan butter
1 tbs mango chutney
1 tsp baking powder
1 tsp allspice
1 tsp salt
1/2 tsp chili powder
1/2 cup cold vegan milk (I used Kara Coconut milk)
Experiments in the lab
1. sift the flours, salt, chili powder, all spice and baking powder into a bowl
2. add the ‘butter’ and mango chutney and lightly use fingertips to mix to a crumb
3. add the ‘milk’ and form into a ball (add more if necessary) - you are looking for a pastry consistency that holds together
4. chill for minimum of 10 minutes
5. roll out onto a board to about 1/8 inch or 2-3 mm thick (I use baking parchment on top and underneath the pastry and roll out between the sheets as is a great way to save on cleaning up and it also prevents sticking to the surface)
6. use your cutter to cut out the shapes and place on a parchment covered baking sheet
7.bake for 12-15minutes until just turning a golden colour and nice and crisp when turned out onto a rack and cooled.
8. use the cashew cream to decorate in a far more arty way than I managed.
Happy Halloweeen! x


Filed Under: Snacks, Soups Tagged With: gingerless unbread biscuits, gluten free, halloween, HOME, Recipes, savoury biscuits, SOUP. snacks, vegan crackers

Moroccan Butternut Squash Parcels and a dose of hindsight

October 11, 2011 by India Leigh 2 Comments

 A monster butternut squash and a touch of nostalgia over reminiscences of a trip to the feverish labyrinth of Marrakesh , fuelled the inspiration for this recipe.   Though made in the quiet of my country home and not amidst the heaving, dusty, noisy and colourful passageways of the Moroccan city, the spices and sweet cinnamon air in my kitchen made me smile.  The trip had been the exciting destination of a third date with a flashy American artist I’d met during my brief dalliances with Internet dating.  All was going well until he failed to rally his adventurous side when grappling with the High Atlas mountains.  This rather overshadowed the heroic fighting off of a team of heckling brothers who wanted rather too much pocket change to give us directions to our riad.  God, poor boy didn’t stand a chance with my rather exorbitant expectations ways…alas hindsight is a blessing and a curse!
However, thankfully the taste for exotic floral spices remained, even if the man did not.
Moroccan Butternut Squash Parcels
Makes approx 10
Preheat oven to 375/190
Ingredients
Filling
1 1/2  cup squash 1/4 inch diced
1 small onion
3-4 dried organic apricots chopped to approx size of a raisin
2 cloves garlic finely chopped
1 tbs fresh ginger chopped fine
1 tsp cumin  seeds
1 tbs harissa paste
1 tbs pine nuts (toasted)
1 tbs orange zest
juice of 1/2 orange
1/2 tsp dried coriander
1 tsp salt
1/2 tsp freshly ground black pepper
1 tbs olive oil
To make the pastry, follow the recipe here (scroll down the bottom) leave to rest in the fridge for 30 mins.
Method
1. saute the onions in the oil for 8-10 minutes or until golden then add the garlic and cook for a further 2-3 minutes
2. add the spices and cook for 2-3 minutes
3. add remaining ingredients and stir fry to a minute or so

5. add the juice of half an orange, pop the lid on and simmer until the squash is soft but not mushy. Add a little water if needed.
6. take the pastry out from the fridge and roll out onto a floured board (or between two baking parchment sheets) to 1/8inch thick. Use a pastry cutter (4inch) to cut out circles then spoon a little of the mixture into the middle. Careful not to overfill. fold the pastry over the filling and press together. Pop onto a baking sheet covered with baking parchment (use the sheet you used to roll the pastry) and brush with vegan milk. Continue until all the mixture is tucked up in a blanket of pastry.
7.bake for 12-15 mins until browned and then turn over and bake again for a further 10 mins or until golden.
8.leave to cool on a wire rack slightly before serving.

They freeze well and are great to drag out for drinks and nibbles or as did I, consume when sitting all alone wondering perhaps just why you are still single!
bil hana wish shifa’


Filed Under: Entree/Mains, Snacks Tagged With: butternut squash, HOME, moroccan, Recipes, vegan snacks

CELERIAC GRIDDLE SCONES with roasted leeks and creamy caper sauce - Gluten free

September 28, 2011 by India Leigh 1 Comment

CELERIAC GRIDDLE SCONES with roasted leeks and creamy caper sauce – Gluten free

These scones are not like oven scones, they get a really nice golden crust and a richer,  more robust flavour.  I took the inspiration from one of the books I’ve been flicking through the pages of, at night before I slumber.  The book listed potato scones but I preferred the idea of flavourful celeriac instead. 
Celeriac Griddle Scones - makes 6
500g (small) celeriac - peeled and cut into 2inch (ish) cubes
1/2 cup sorghum flour (juwar)
1 tbs garbanzo flour
1 green (salad) onion finely chopped
1/2 tbs finely chopped rosemary
1/4 tsp baking powder
1/2 tsp sea salt
1/4 tsp fine ground white pepper
1tbs oil for frying
Method
1. steam the celeriac until soft (retain a little of the cooking water if needed to bind the mix). mash
2. add all the other ingredients, through to the oil for frying, and mix well to form a ball of ‘dough’
3. roll out on a floured surface (or grease proof paper…easier to clean up!) to 1/2 inch thick
4. use a pastry cutter or a glass to cut into rounds
5. in a heated and lightly oiled skillet, cook the rounds on each side until lightly browned
6. serve immediately
The scones freeze well.  They are also very nice as a lunch with one of my fabulous-hummus-sisters or as a lid for a vegan pie.
I served with roasted leeks and tomatoes - simply drizzle with a good oil, season and roast.  Simple, silky, and the flavour is intense.
I made a quick caper sauce to pour over my leeks and scones and bring the dish together.
1 tbs vegan butter
1 tbs brown rice flour
1/2 cup vegan milk (I used unsweetened hemp)
2 tbs capers
season with salt and freshly ground black pepper
Method
1. melt the butter in a pan and add the flour.
2. stir until the flour is melted ensuring it doesn’t burn.
3. slowly pour in the milk whilst stirring constantly
4. simmer for 3-4 minutes.  If it thickens too much add a little more milk.
5. add the capers and heat for a further 30 seconds
6. season to taste
‘buttery’, crumbly loveliness…


Filed Under: Entree/Mains, Sauces and Dressings, Snacks Tagged With: book review, celeriac, gluten free, griddle scones, HOME, leeks, Recipes, scones

Introducing the fabulous HUMMUS SISTERS!

June 22, 2011 by India Leigh Leave a Comment

Introducing the fabulous HUMMUS SISTERS!
I am addicted to hummus. I am a Gemini. I get bored.  I like to be creative (OK so my veggie drawing skills need some work! and YES that is what the inside of a tomato looks like).  The equation  A+G+B+C = solution…THE HUMMUS LAB.
My kitchen looked like a bomb site after I’d put all these together, and I did spin around on the spot wondering what I was doing more than once.  But I managed to pull it off.
Isn’t it beautiful written in Arabic…  حمّص بطحينة
 
For the basic hummus I used
1 can organic chickpeas - drained
1 tsp tahini
1 large garlic clove
juice of half a lemon
1tps salt
*note: this is quite a low fat recipe.  Make it to your taste, you can add more tahini or a swirl of olive oil on top too to make it more unctuous**
Once you have the basic recipe you can then get creative with your flavours.  I made 3 alternatives here today.  I’ll be your muse and suggest a few others at the end (of this post, not the end of time…that would be silly).
the dazzling hummus sisters
Ms Sundried tomato hummus
To make sundried tomato hummus just add as many as you like (the type in oil in a jar are best).  For a smokey flavour you could add smoked paprika.
 
Miss Carrot & Cumin hummus


To add a colourful twist to your basic recipe add a carrot and blend (add more tahini as the carrot will add moisture and make it a bit ‘wet’) and decorate it with freshly ground roasted cumin.  It is sweet, aromatic and delicious.
Miss Olive Noir Hummus

Yes, you did guess right…add olives, BUT for this recipe I also added a spoon of raw black tahini with is coarse and adds a interesting dimension.

Other suggestions - mustard, chili spiked or wasabi hummus.  You know you can use other white beans too, and even omit the beany element altogether and use zucchini instead.

For a whole wealth of of hummus factoids for you beany paste geeks…..here is the Wikipedia low down.

How do you hummus?


Filed Under: Sauces and Dressings, Snacks Tagged With: low fat, Recipes

OK OK YOU ASKED FOR IT - You paid the ransom, You get the recipe

June 9, 2011 by India Leigh Leave a Comment

I was absolutely hounded (this truth, as a concept…has quite a fair amount of elasticity!), to divulge the ingredients and ‘how to’ for the BLACK BEAN & WALNUT PARTY BURGERS I posted a few days ago.  I have given in to the pressure, and I now lay what you have behest at your feet….

Black bean & walnut burgers….Copyright aveganobsession
YOU WILL NEED
1 1/2 cups cooked black beans (drained)
1 cup cooked brown rice
3/4 cup of walnuts
1 small finely chopped leek
1 small onion finely chopped (I have used without as I made caramelized onions to sit on the burger…otherwise add)
1 clove garlic
1/2 red pepper diced
1 small red chili
1 tbp rice vinegar (or 1/2 apple cider vinegar….the rice is sweeter and not as sharp)
1/4 - 1/2 cup soya/besan/quinoa/oat flour or cooked and cooled polenta, whichever you have floating about…they all work well to bind the mix.  How much you use depends on the moisture in your mix.
2 tsp freshly roasted cumin. ground.  If not powder is ok.
1 tsp paprika
1 tbs fresh herbs…I used a mint/coriander mix but you could use just coriander (ciltrano) or basil for a taste of the Med (add some sundried toms too….umm, that’d be nice) basically…I encourage you to experiment..its YOUR burger party right?!  
1 tsp onion powder
1/2 tsp smoked paprika (optional)
2 tbp olive oil for frying                                                                                     Makes approx 8 burgers
ARE YOU READY?  WE SHALL BEGIN
fry the leeks in the oil (and onion if adding) until soft.  Add the garlic until it turns golden, careful not to burn, and 1/2 the chili.  Remove with a slotted spoon.  Retain oil in the pan for later.
In a bowl add 2/3 of the beans and rice (some will be added whole at a later stage), walnuts the leeks, garlic etc and the spices.  Season with salt and pepper (I use 1 tsp pink salt and lashings of black pepper).  Blend.
Add into the bowl the rest of the beans, rice,  the flour, finely chopped chili and chopped herbs.  Mix.  Now, it should be holding together well, if not add a little more flour.  Shape into burgers and put on a baking tray and pop into the fridge…YES, I did say fridge..leave for as long as you can…30 mins minimum..this firms them up nicely..ready for frying.
Gently place burgers into the pan the garlic etc was fried in and fry on each side for approx 4-5 mins.  Lift them out gently when done.  You could also bake them for 20-25 mins in the oven (if you want a low fat version).
Serve with salad, caramelized onions, sauteed mushrooms, sweet potato fries and polenta crisp (I flavoured the polenta with a dusting of vegan Parmesan) and a chipotle/tomato sauce…or Veganaise…or mustard….or cashew ‘sour cream’….Oh God..how about a side of sauteed plantains instead?….oooh the possibilities……..
Vlola!  Now party!
Copyright aveganobsession

Filed Under: Entree/Mains, Lunch, Snacks Tagged With: burgers, gluten free, party food, Recipes

  • 1
  • 2
  • Next Page »

About Me

Hi, my name is India. Welcome to A Vegan Obsession. This site is for you to enjoy the delicious discoveries of a gluten free, vegan traveller and cook. Read More…

  • 
  • 
  • 
  • 
  • 

Search

Subscribe

Buy The Cooking App

V Is For Vegetable

Popular Posts

icouldnevergovegan2
lemon-252C-cardamon-cookies-dipped-in-chocolate-with-chopped-pistacios-252825-2529
Screen-Shot-2013-08-01-at-21.44.57
vday-love-chunky-set
bombay
  • 1
  • 2
  • 3
  • …
  • 84
  • Next Page »

Health

HOT TOPIC Vegan Dog Food - Can your dog…

IMG_9035

What are your antioxidant levels? Protect…

IMG_9166

As Featured in the Sunday Telegraph Magazine…

IMG_7462

How To Stay Healthy Whilst Travelling…

IMG_6605
  • 1
  • 2
  • 3
  • Next Page »

Connect

Discoveries of a gluten free, sugar free, vegan foodie. Read More…

icouldnevergovegan2
lemon-252C-cardamon-cookies-dipped-in-chocolate-with-chopped-pistacios-252825-2529
Screen-Shot-2013-08-01-at-21.44.57
vday-love-chunky-set
bombay
sriracha-tofu-on-skewers-25281-2529

Copyright © 2016 · Foodie Theme by Shay Bocks · Built on the Genesis Framework · Powered by WordPress